Click LIKE & follow us on Facebook for recipe updates

COOK WITH LOVE FOR A HAPPY HIM

Singapore home cooking/ baking/ food & recipe blog features more than 500 tried & tested, quick & easy kid friendly recipes with steps by steps tutorial.


Follow us on Instagram: mfa_dingoozatfood


If you're a company looking for possible collaboration, feel free to send me a message via Miki's Food Archives Facebook Fan Page or email to miki9mak@gmail.com


Search This Blog

Monday, 31 May 2021

Teriyaki Meat Patty Rice Bowl 照烧酱肉饼饭


Flavourful and scrumptious Teriyaki Meat Patty & Egg Rice Bowl, easily cooked at home!


Ingredients: 
中文食谱:请在网页的右边点击Translate,然后选择中文翻译。

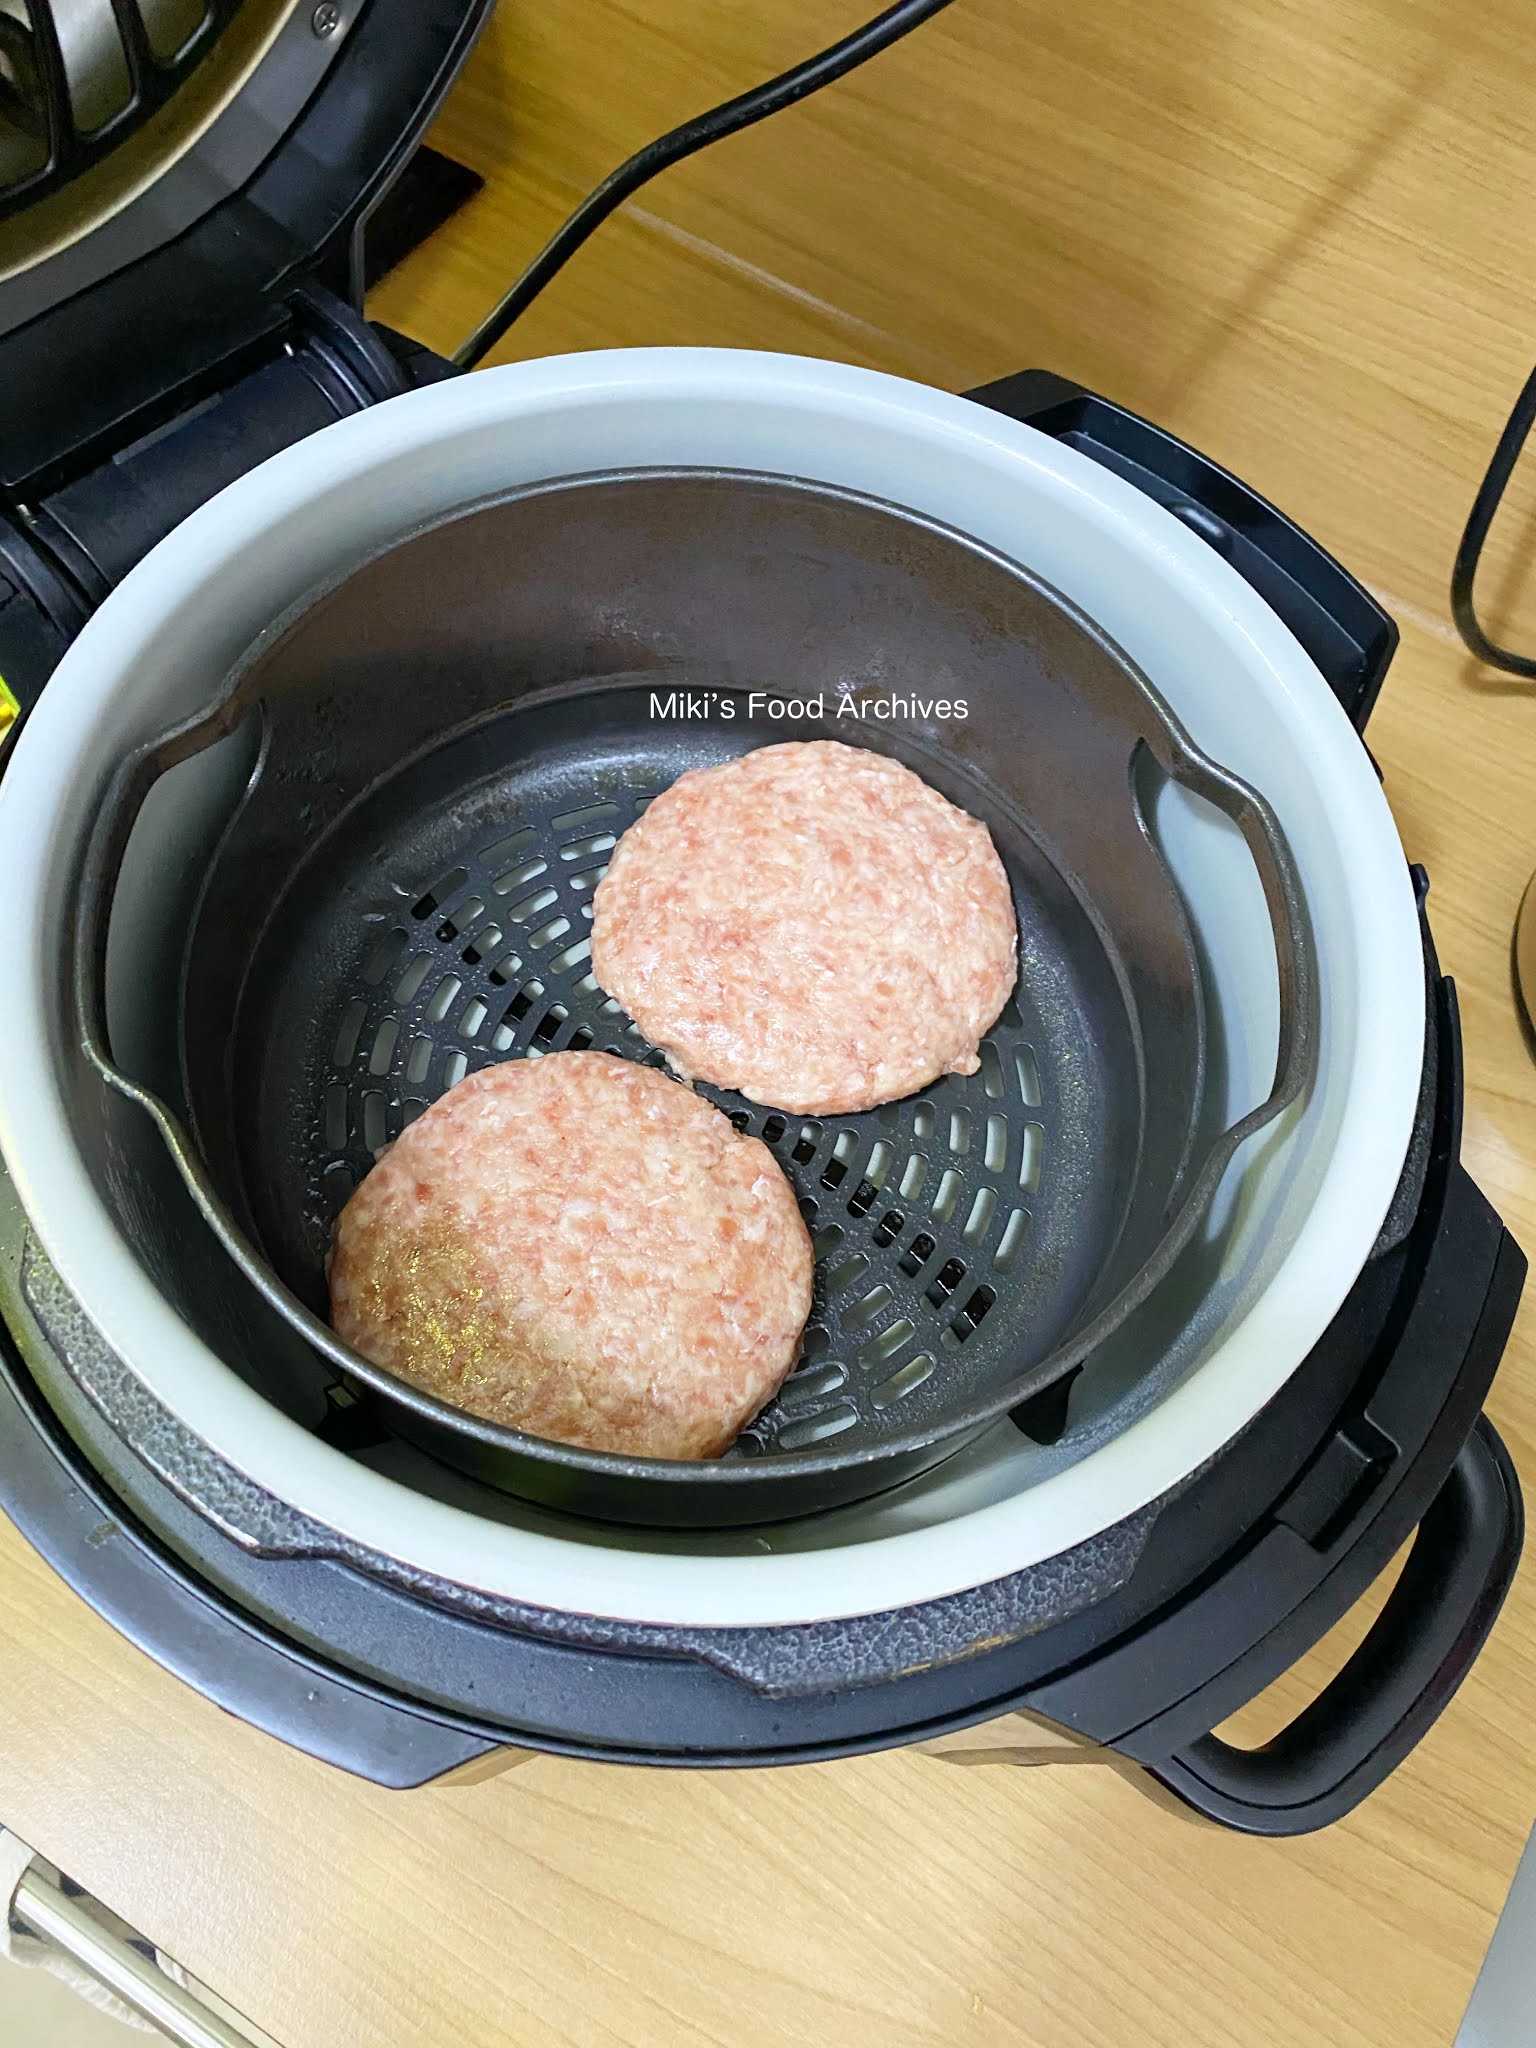
2 Meat Patties tap here for details
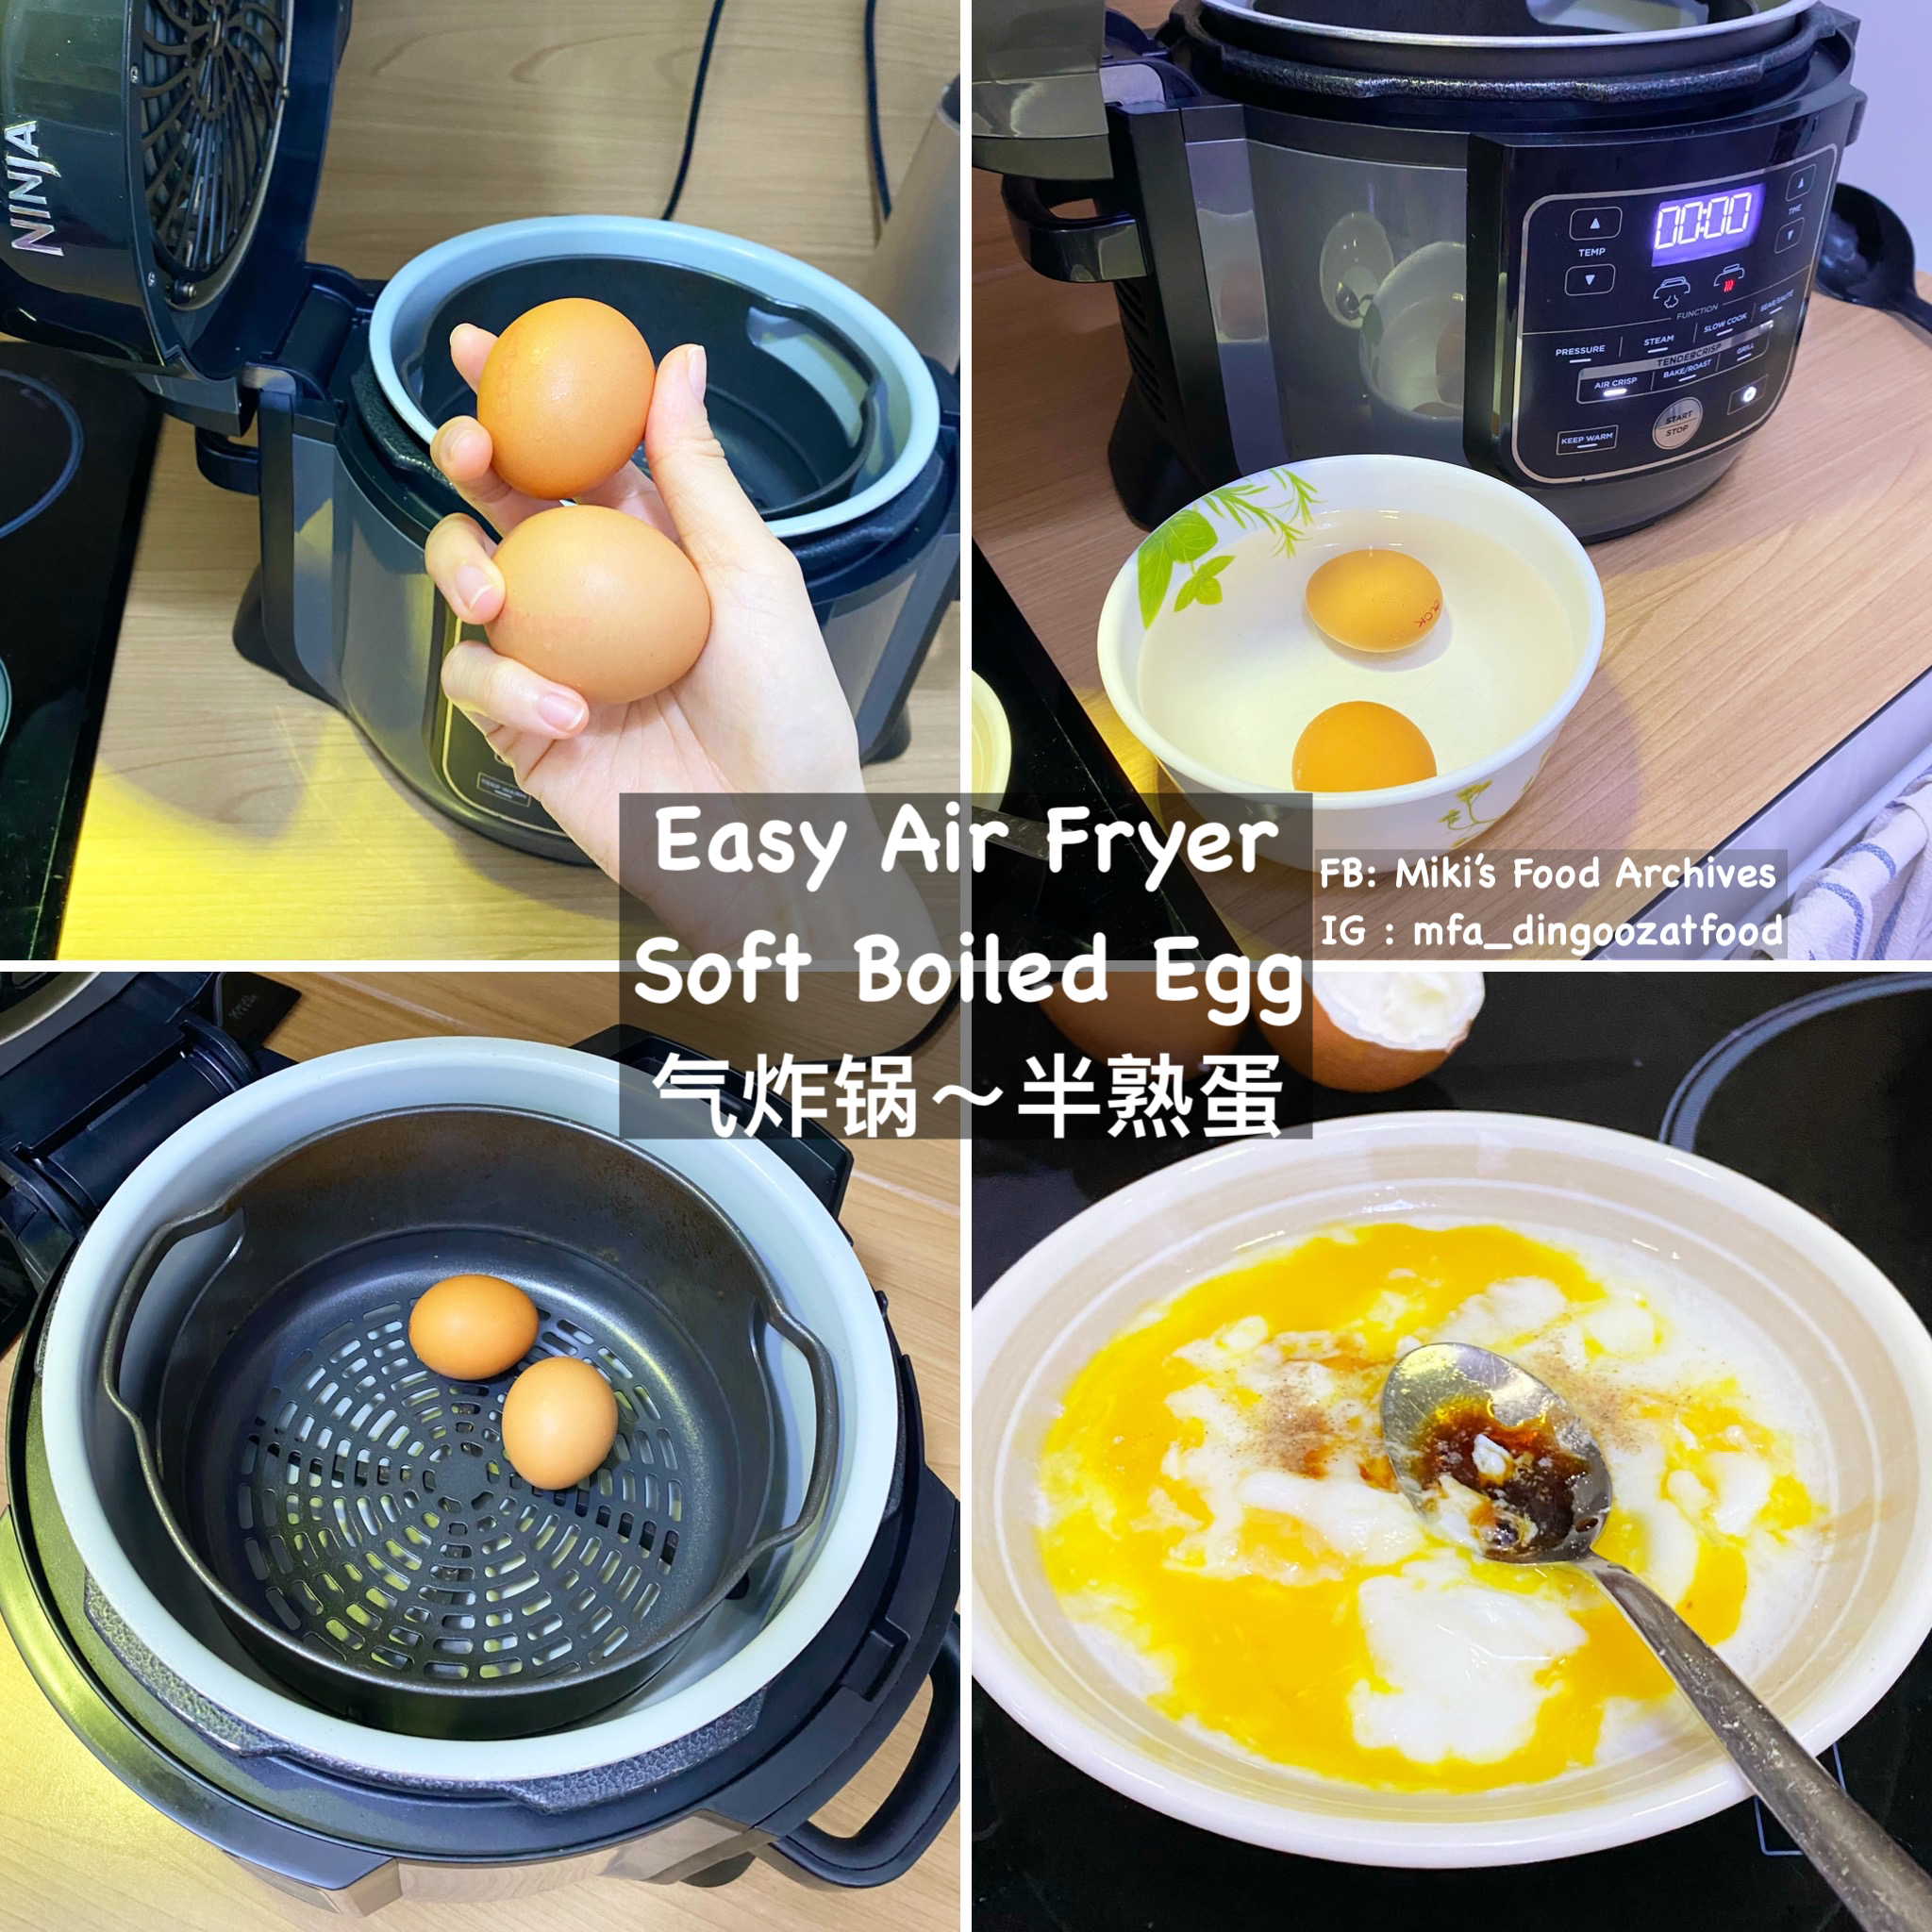
2 Eggs


Cooked Japanese rice and veggies.


If you are sharing this recipe/ blog content, kindly attach the link to this blog instead of screen capture/ copy & paste/ use in your blog. No parts of the content of this blog may be reproduced without prior written permission. All rights reserved. Thank you. 如果您要分享此食谱/内容,请联系这个部落格的相关链接。敬请不要复制或改篇为自己的食谱。谢谢!


Method:

1. Spray some oil on the paper liners, and pour in the egg. 


2. Air-fry 180'C 5 minutes. When it's done, remove the eggs. 


Wagyu Beef Burger along with AirCrisp egg, curly fries, and hashbrowns
Photo Updated: June 2021

Cute Kitty Cat Wagyu Beef Burger along with AirCrisp hashbrowns and veggies
Photo Updated: October 2021

Happy bear Teriyaki Meat Patty Rice Bowl.
it was a cute bear before the cheese melted >.<
Photo updated: Dec 2021

Teriyaki meat patty rice along with sauteed mushrooms in miso sauce, a tasty hearty meal for the son to eat after school. Photo updated: Oct 2022

Made this Cheeseburger Bagel for the son's breakfast using the same recipe, this time I added some shredded carrot and oats to the meat patty. Photo updated: Oct 2024

3. Spray some oil on the cooking basket. Add in meat patties, grill for 10 minutes. Baste/ brush Teriyaki sauce halfway cooking. When it's done, glaze the patties with more sauce and serve right away along with rice, egg, and veggies. 若喜欢我的食谱,可以LIKE和追随我的面书专页,不要错过最新食谱发布。
If you like my recipe, click hereLIKE & follow Miki's Food Archives Facebook page or follow us on Instagram: mfa_dingoozatfood  to receive more recipe updates. Don't forget to favourite my pages if you wish to see my post on your news feed. 

Friday, 28 May 2021

Coconut Yam/ Taro Paste 椰香芋泥【视频食谱、简单做法】


This creamy, smooth and delicious Coconut Yam Paste is bursting with coconut and yam flavour with a hint of sweetness and Pandan aroma. Traditionally, Teochew Orh Nee/ Yam Paste is made by cooking the yam with sugar and shallot oil, serve with candied ginkgo nuts or pumpkin paste. I personally like those served at the Chinese restaurant, a lighter texture, less oily and without the strong shallot oil smell. I preferred shallot oil in savoury dishes more than adding it to sweet desserts. 

This is a simplified and healthier version that uses no oil and a minimal amount of sugar, and added coconut milk instead of shallot oil. This recipe is highly customizable, you can adjust the amount of sugar or replace coconut milk with shallot oil if you love the traditional Teochew Orh Nee. This recipe yields a small portion because I'm making it for myself, feel free to double the amount if you'd like to make more for the family. 


 Yummy Yam/ Taro Paste With Almond Cream Dessert.
Tap here for recipe 


Ingredients:

300g Yam 

2 Pandan Leaves

Water, add to 2 cups level

1/4 tsp Purple Sweet Potato Powder (optional natural colouring)

50g Coconut Milk

50g Sugar


If you are sharing this recipe/ blog content, kindly attach the link to this blog instead of screen capture/ copy & paste/ use in your blog. No parts of the content of this blog may be reproduced without prior written permission. All rights reserved. Thank you. 如果您要分享此食谱/内容,请联系这个部落格的相关链接。敬请不要复制或改篇为自己的食谱。谢谢!


Method:

1. Pressure cook yam and pandan leaves for 10 minutes, quick pressure release. 


2. Add the yam and the remaining ingredients into a blender, blend until smooth. When it's ready, serve warm with your favourite toppings. Watch the recipe video tutorial below for easy reference.若喜欢我的食谱,可以LIKE和追随我的面书专页,不要错过最新食谱发布。If you like my recipe, click hereLIKE & follow Miki's Food Archives Facebook page or follow us on Instagram: mfa_dingoozatfood  to receive more recipe updates. Don't forget to favourite my pages if you wish to see my post on your news feed. 


Thursday, 27 May 2021

Homemade Teriyaki Sauce 自制日式照烧酱


One of the condiments that I frequently made from scratch is Teriyaki Sauce because my kid loves everything glazed or cooked with Teriyaki Sauce. Sweet, savory, and versatile, you can adjust the taste to suit your own preferences. It will be your go-to sauce for salmon, chicken, pork, beef, or even grilled vegetables and mushrooms. 

This is the basic recipe to make Teriyaki Sauce, without adding starch to thicken the sauce so that it's versatile and can be used in almost everything, I only add corn starch solution before adding it to the dish. Tips: If you need sticky or thick consistency, stir in corn flour + water to thicken the sauce. 


Grilled Teriyaki Shortribs, marinated with homemade Teriyaki Sauce.
Photo Updated: Oct 2021


Ingredients: 
中文食谱:请在网页的右边点击Translate,然后选择中文翻译

180g Sake

180g Mirin

180g Japanese Soy Sauce

100g Sugar  (can be reduced to 80g if you like it less sweet)

2 cloves Garlic

2 sliced Ginger


If you are sharing this recipe/ blog content, kindly attach the link to this blog instead of screen capture/ copy & paste/ use in your blog. No parts of the content of this blog may be reproduced without prior written permission. All rights reserved. Thank you. 如果您要分享此食谱/内容,请联系这个部落格的相关链接。敬请不要复制或改篇为自己的食谱。谢谢!


Method: 

1. Add all ingredients into the blender. Turn on the unit, select <BLEND>, PULSE 5 times. 


2. Remove the top cap, select <COOK> on high heat, let it cook for 15 minutes. When it's done, pour the sauce through a strainer. Let it cooled completely, use it right away, or keep chilled for later use.若喜欢我的食谱,可以LIKE和追随我的面书专页,不要错过最新食谱发布。If you like my recipe, click hereLIKE & follow Miki's Food Archives Facebook page or follow us on Instagram: mfa_dingoozatfood  to receive more recipe updates. Don't forget to favourite my pages if you wish to see my post on your news feed. 

Saturday, 22 May 2021

Easy Air Fryer Soft Boiled Eggs 气炸锅半熟蛋 [5 Minutes Recipe]


[Learn how to make Kopitiam-style soft-boiled egg using an air-fryer at home.]

Air Fryer soft boiled egg isn't something new, most people did it using cold egg straight from the fridge, air fry for 10-12 minutes. Well, the soft-boiled egg can be easily made in 5 minutes using hot water (my mom's method), 10-12 minutes is not my to-go, especially on the busy rush hour morning! I've tried a quicker method using room temperature eggs, the eggs turned out perfect in 5 minutes, it's easier in a way as I don't have to watch the clock and boil hot water! :D 

Ingredients:
中文食谱:请在网页的右边点击Translate,然后选择中文翻译

2 Eggs, room temperature

A bowl of water

Seasoning: Soy Sauce and White Pepper, add to taste

Appliance: [Ninja Foodi Multi-Cooker] 

Watch Video Tutorial < How to make Soft Boiled Egg in Ninja Foodi / Air Fryer >


Note: 

- Eggs have to be at room temperature. If using cold egg, increase cooking time.

- Once done, remove the egg and transfer to a bowl of water, leave it in the water for few seconds will do. Crack the eggs and serve right away. 若喜欢我的食谱,可以LIKE和追随我的面书专页,不要错过最新食谱发布。

If you like my recipe, click hereLIKE & follow Miki's Food Archives Facebook page or follow us on Instagram: mfa_dingoozatfood  to receive more recipe updates. Don't forget to favourite my pages if you wish to see my post on your news feed. 

If you are sharing this recipe/ blog content, kindly attach the link to this blog instead of screen capture/ copy & paste/ use in your blog. No parts of the content of this blog may be reproduced without prior written permission. All rights reserved. Thank you. 如果您要分享此食谱/内容,请联系这个部落格的相关链接。敬请不要复制或改篇为自己的食谱。谢谢!


By readers, some feedback from those who have tried this recipe:

By jinmei1127


Thursday, 20 May 2021

Grilled Stingray With Teriyaki Sauce 照烧酱烤魔鬼鱼


My family loves grilled stingray in banana leaf, it's easy to prep and tasty too! 


Grilled Teriyaki Sauce Stingray 


My favourite is Spicy Sambal Stingray, whenever I make sambal stingray, I'll make a non-spicy version with Teriyaki Sauce for my boy who doesn't eat spicy food. If you're not a fan of spicy food, you can give this a try!


中文食谱:请在网页的右边点击Translate,然后选择中文翻译

2 slices Stingray

1 tbsp Sesame Oil

1 Banana Leaf

1 clove Garlic, mashed

5-6 pcs Baby King Oyster Mushrooms, sliced

Some Teriyaki Sauce (homemade/ store-bought), Salt & Pepper, add to taste


Garnish: chopped spring onion (optional)


If you are sharing this recipe/ blog content, kindly attach the link to this blog instead of screen capture/ copy & paste/ use in your blog. No parts of the content of this blog may be reproduced without prior written permission. All rights reserved. Thank you. 如果您要分享此食谱/内容,请联系这个部落格的相关链接。敬请不要复制或改篇为自己的食谱。谢谢!

Method:

1. Slit the stingray, brush a thin layer of oil on the banana leaf. 


2. Rub some salt, pepper and sesame oil on the stingray and mushrooms, mix in mashed garlic, let marinate for 15 minutes.


3. Grill 8 minutes. Brush/ baste the stingray and mushrooms with Teriyaki sauce, continue to grill for 1-2 minutes or until cooked through. Garnish with spring onion and serve right away. 
Note: Do adjust the grilling time according to the thickness of the stingray. 
若喜欢我的食谱,可以LIKE和追随我的面书专页,不要错过最新食谱发布。If you like my recipe, click hereLIKE & follow Miki's Food Archives Facebook page or follow us on Instagram: mfa_dingoozatfood  to receive more recipe updates. Don't forget to favourite my pages if you wish to see my post on your news feed. 

Tuesday, 18 May 2021

Bubur Cha-cha Dessert 香浓摩摩喳喳糖水 [Quick & Easy Pressure Cooker Recipe]


A classic bowl of Bubur Cha-cha, this is a coconut milk dessert cooked with sweet potatoes, yam, and pandan leaves to give a sweet and fragrant aroma. I love it with creamy thick coconut milk and lots of sago pearls. This is not the typical Nyonya version, it's my mom's recipe with simple ingredients that I further simplified the method.

Ingredients:
中文食谱:请在网页的右边点击Translate,然后选择中文翻译

150g Sweet Potato

185g Yam

4pcs Pandan Leaves

50g Rock Sugar

100g Coconut Milk

Pinch of Salt

25g Sago 

Water


If you are sharing this recipe/ blog content, kindly attach the link to this blog instead of screen capture/ copy & paste/ use in your blog. No parts of the content of this blog may be reproduced without prior written permission. All rights reserved. Thank you. 如果您要分享此食谱/内容,请联系这个部落格的相关链接。敬请不要复制或改篇为自己的食谱。谢谢!

Method:

1. Place sweet potato, yam, pandan leaves and rock sugar into the cooking pot. Add water until 2 cups level or just enough to cover the ingredients.


2. PRESSURE COOK (HI) 8 minutes. Meanwhile, cook the sago in hot water for 5 minutes, turn off heat, cover with a lid, let it sit for 5 minutes or until all the sago turned transparent.


3. When the cooking has completed, quick release pressure. 


4. Stir in coconut milk, salt and cooked sago. Simmer for a minute, serve warm or chilled. 若喜欢我的食谱,可以LIKE和追随我的面书专页,不要错过最新食谱发布。
If you like my recipe, click hereLIKE & follow Miki's Food Archives Facebook page or follow us on Instagram: mfa_dingoozatfood  to receive more recipe updates. Don't forget to favourite my pages if you wish to see my post on your news feed. 

Saturday, 15 May 2021

Alfredo Pasta With Scallops & Ham 带子火腿白酱意大利面


My son and I love creamy pasta! Sharing an easy and quick way to cook pasta with homemade Alfredo Sauce.

Ingredients: 2 servings 
中文食谱:请在网页的右边点击Translate,然后选择中文翻译

2 cloves Garlic, chopped

1 tbsp Butter plus some oil for cooking

8 Swiss Brown Mushroom, sliced

70g Ham, diced

10-12 Scallops

Some Salt & Pepper, add to taste

Water

120g Pasta - Fettuccine/ Spaghetti 


Garnish: Fresh Parsley


If you are sharing this recipe/ blog content, kindly attach the link to this blog instead of screen capture/ copy & paste/ use in your blog. No parts of the content of this blog may be reproduced without prior written permission. All rights reserved. Thank you. 如果您要分享此食谱/内容,请联系这个部落格的相关链接。敬请不要复制或改篇为自己的食谱。谢谢!

Method:

1. Heat some oil, sear the scallops, season with salt and pepper, set aside. Add in butter and garlic, stir fry until fragrant. Add in mushroom and ham, stir fry to soften the mushrooms. Season with some salt and pepper, set aside.


2. Add some warm water into the pot - 2 cups level. Add a pinch of salt and the raw pasta (break-half as shown in the pic below). Close the pressure lid, set PRESSURE COOK (HI) - 1 minute.


3. When the cooking has completed, quick-release pressure. Discard the water. Add in all ingredients. Simmer and toss to combine the ingredients. Garnish with parsley, serve right away. Note: The pasta is al dente after 1 min pressure cook. If you're not cooking for young children or the elderly (who usually preferred softer texture pasta), just toss in sauce and serve. Adjust the cooking time if you're not using spaghetti. 若喜欢我的食谱,可以LIKE和追随我的面书专页,不要错过最新食谱发布。If you like my recipe, click hereLIKE & follow Miki's Food Archives Facebook page or follow us on Instagram: mfa_dingoozatfood  to receive more recipe updates. Don't forget to favourite my pages if you wish to see my post on your news feed. 

Friday, 14 May 2021

Easy Alfredo Sauce/ Creamy Cheese Sauce 意大利白酱【超简单做法】


Here's a super easy and yummy Alfredo sauce recipe, so creamy and yummy, it's perfect to toss with pasta, use as pizza topping/ spread, serve along with roasted chicken/ grilled meat/ veggies, and everything else that you'd like to pair with creamy sauce. 

Homemade Alfredo Sauce aka creamy cheese sauce

Serving suggestion: Spaghetti Alfredo
Easily prepared using homemade Alfredo sauce.
<<Click here for recipe>>


Ingredients: 
中文食谱:请在网页的右边点击Translate,然后选择中文翻译

10g Butter

2 cloves Garlic 

250g Cooking Cream

140g Cream Cheese

110g Parmesan Cheese

This is for 3 servings, feel free to double the recipe if you're cooking for more pax. 


If you are sharing this recipe/ blog content, kindly attach the link to this blog instead of screen capture/ copy & paste/ use in your blog. No parts of the content of this blog may be reproduced without prior written permission. All rights reserved. Thank you. 如果您要分享此食谱/内容,请联系这个部落格的相关链接。敬请不要复制或改篇为自己的食谱。谢谢!


Method: 

1. Add garlic, and butter into the blender. Turn on the unit, select <SAUTE>. This will takes about 5 minutes. 


2. When it's done, add in the remaining ingredients. Select <SAUCE/DIP>.  


3. The program will run for 30mins. 若喜欢我的食谱,可以LIKE和追随我的面书专页,不要错过最新食谱发布。If you like my recipe, click hereLIKE & follow Miki's Food Archives Facebook page or follow us on Instagram: mfa_dingoozatfood  to receive more recipe updates. Don't forget to favourite my pages if you wish to see my post on your news feed. 

Related Posts Plugin for WordPress, Blogger...