Click LIKE & follow us on Facebook for recipe updates

COOK WITH LOVE FOR A HAPPY HIM

Singapore home cooking/ baking/ food & recipe blog features more than 500 tried & tested, quick & easy kid friendly recipes with steps by steps tutorial.


Follow us on Instagram: mfa_dingoozatfood


If you're a company looking for possible collaboration, feel free to send me a message via Miki's Food Archives Facebook Fan Page or email to miki9mak@gmail.com


Search This Blog

Friday, 30 June 2023

Meringue Cookies aka Meringue Kisses 法式马林糖|蛋白糖霜【轻盈香甜、入口即化】


These beautiful meringue kisses are light and crisp with just the right hint of sweetness that'll melt in your mouth the moment you pop them in. Made with a few simple ingredients, this recipe is versatile, you can add any flavour or colour as you desired. Have fun baking!

Strawberry Flavour Meringue Kisses

Ingredients: 
中文食谱:请在网页的右边点击Translate,然后选择中文翻译

60g/ 2 Large Egg White

1/4 tsp Lemon Juice/ Cream of Tartar

70g Castor Sugar

10g Corn Flour


If you are sharing this recipe/ blog content, kindly attach the link to this blog instead of screen capture/ copy & paste/ use in your blog. No parts of the content of this blog may be reproduced without prior written permission. All rights reserved. Thank you. 如果您要分享此食谱/内容,请联系这个部落格的相关链接。敬请不要复制或改篇为自己的食谱。谢谢!

Method: 步骤

1. In a mixing bowl, beat the egg white until foamy, add lemon juice/ cream of tartar then continue beating and gradually add sugar. 


2. When the mixture reach stiff peak, add corn flour and whisk to mix well. Mix in flavoring/ colouring, if using. 


3. Transfer the meringue mixture into a piping bag with a fitted nozzle and pipe on a lined baking tray. Bake in a preheated oven 100'C for 30 minutes or until crisp, the baking time depending on the size of the meringue cookies. Leave them to cool in the oven and store in an air-tight container so they will stay crisp for a long time. 若喜欢我的食谱,可以LIKE和追随我的面书专页,不要错过最新食谱发布。

If you like my recipe, click hereLIKE & follow Miki's Food Archives Facebook page or follow us on Instagram: mfa_dingoozatfood  to receive more recipe updates. Don't forget to favourite my pages if you wish to see my post on your news feed. Enjoy!

Tuesday, 6 June 2023

Chicken With Broccoli & Mushrooms In Garlic Cream Sauce 蒜香西兰花蘑菇奶油白汁鸡


This easy creamy chicken with broccoli and mushrooms dish is a fantastic option for a quick-fix meal. It uses cooked chicken which is an excellent way to use up leftover chicken and takes as little as 15 minutes from start to finish. Serve it on top of rice, pasta or toast for a complete wholesome meal.

Ingredients:
中文食谱:请在网页的右边点击Translate,然后选择中文翻译

2 tbsp Garlic


1/2 Roasted Chicken


1 head of Broccoli 


1 Carrot 


1/2 pkt Mushrooms


200ml Cooking Cream


50ml Chicken Broth 


Some Salt & Pepper, add to taste


Some Butter/ Oil for cooking 


If you are sharing this recipe/ blog content, kindly attach the link to this blog instead of screen capture/ copy & paste/ use in your blog. No parts of the content of this blog may be reproduced without prior written permission. All rights reserved. Thank you. 
如果您要分享此食谱/内容,请联系这个部落格的相关链接。敬请不要复制或改篇为自己的食谱。谢谢!


Method:

1. 
Blanch broccoli and carrot, set aside. Heat butter/ oil in the wok, stir fry garlic until aromatic, add mushrooms and stir fry until tender, season with salt and pepper. 

I cooked this dish using Song Cho stainless steel wok, a multi-ply stainless steel wok without chemical coating, it's safe to use in any cooking. 
For more information about the product, visit Song Cho e-shop for details.


2. Add cooking cream and chicken broth, add more seasonings if needed. Heat the mixture until bubbly/ boil.

3. Add the cooked broccoli, carrot and roasted chicken, simmer for a minute or until the chicken is heated and serve right away.

若喜欢我的食谱,可以LIKE和追随我的面书专页,不要错过最新食谱发布。
If you like my recipe, click hereLIKE & follow Miki's Food Archives Facebook page or follow us on Instagram: mfa_dingoozatfood  to receive more recipe updates. Remember to favourite my pages if you wish to see my post on your news feed. 

Enjoy!

Sunday, 4 June 2023

Soft & Fluffy Black Sesame Buns 香软黑芝麻馅面包


These soft and fluffy breads are filled with nutty black sesame paste. They are not overly sweet and stay fresh for several days! I made the fillings from scratch using black sesame seed which is rich in essential nutrients and well known for its anti-ageing properties. These delicious breads are great for breakfast or snacks any time of the day!

Soft and fluffy Black Sesame Buns filled with nutty black sesame paste.
 

If you'd like to try making it at home, tap the link below for recipes.


Click here for Black Sesame Paste/ Fillings Recipe <<Peanut & Black Sesame Paste For Bread/ Steamed Buns Video Recipe 花生黑芝麻馅视频/ 食谱>>点击进入

If you are sharing this blog content, kindly attach the link to this blog instead of screen capture/ copy & paste/ use in your blog. No parts of the content of this blog may be reproduced without prior written permission. All rights reserved. Thank you. 如果您要分享此内容,请联系这个部落格的相关链接。敬请不要复制或改篇为自己的食谱。谢谢!

Thanks for reading, I hope you are inspired after reading my blog. If you love to see my food, click hereLIKE & follow Miki's Food Archives Facebook page or follow us on Instagram: mfa_dingoozatfood  to receive more recipe updates. Remember to favourite my pages if you wish to see my post on your feed. 

Enjoy!

Friday, 26 May 2023

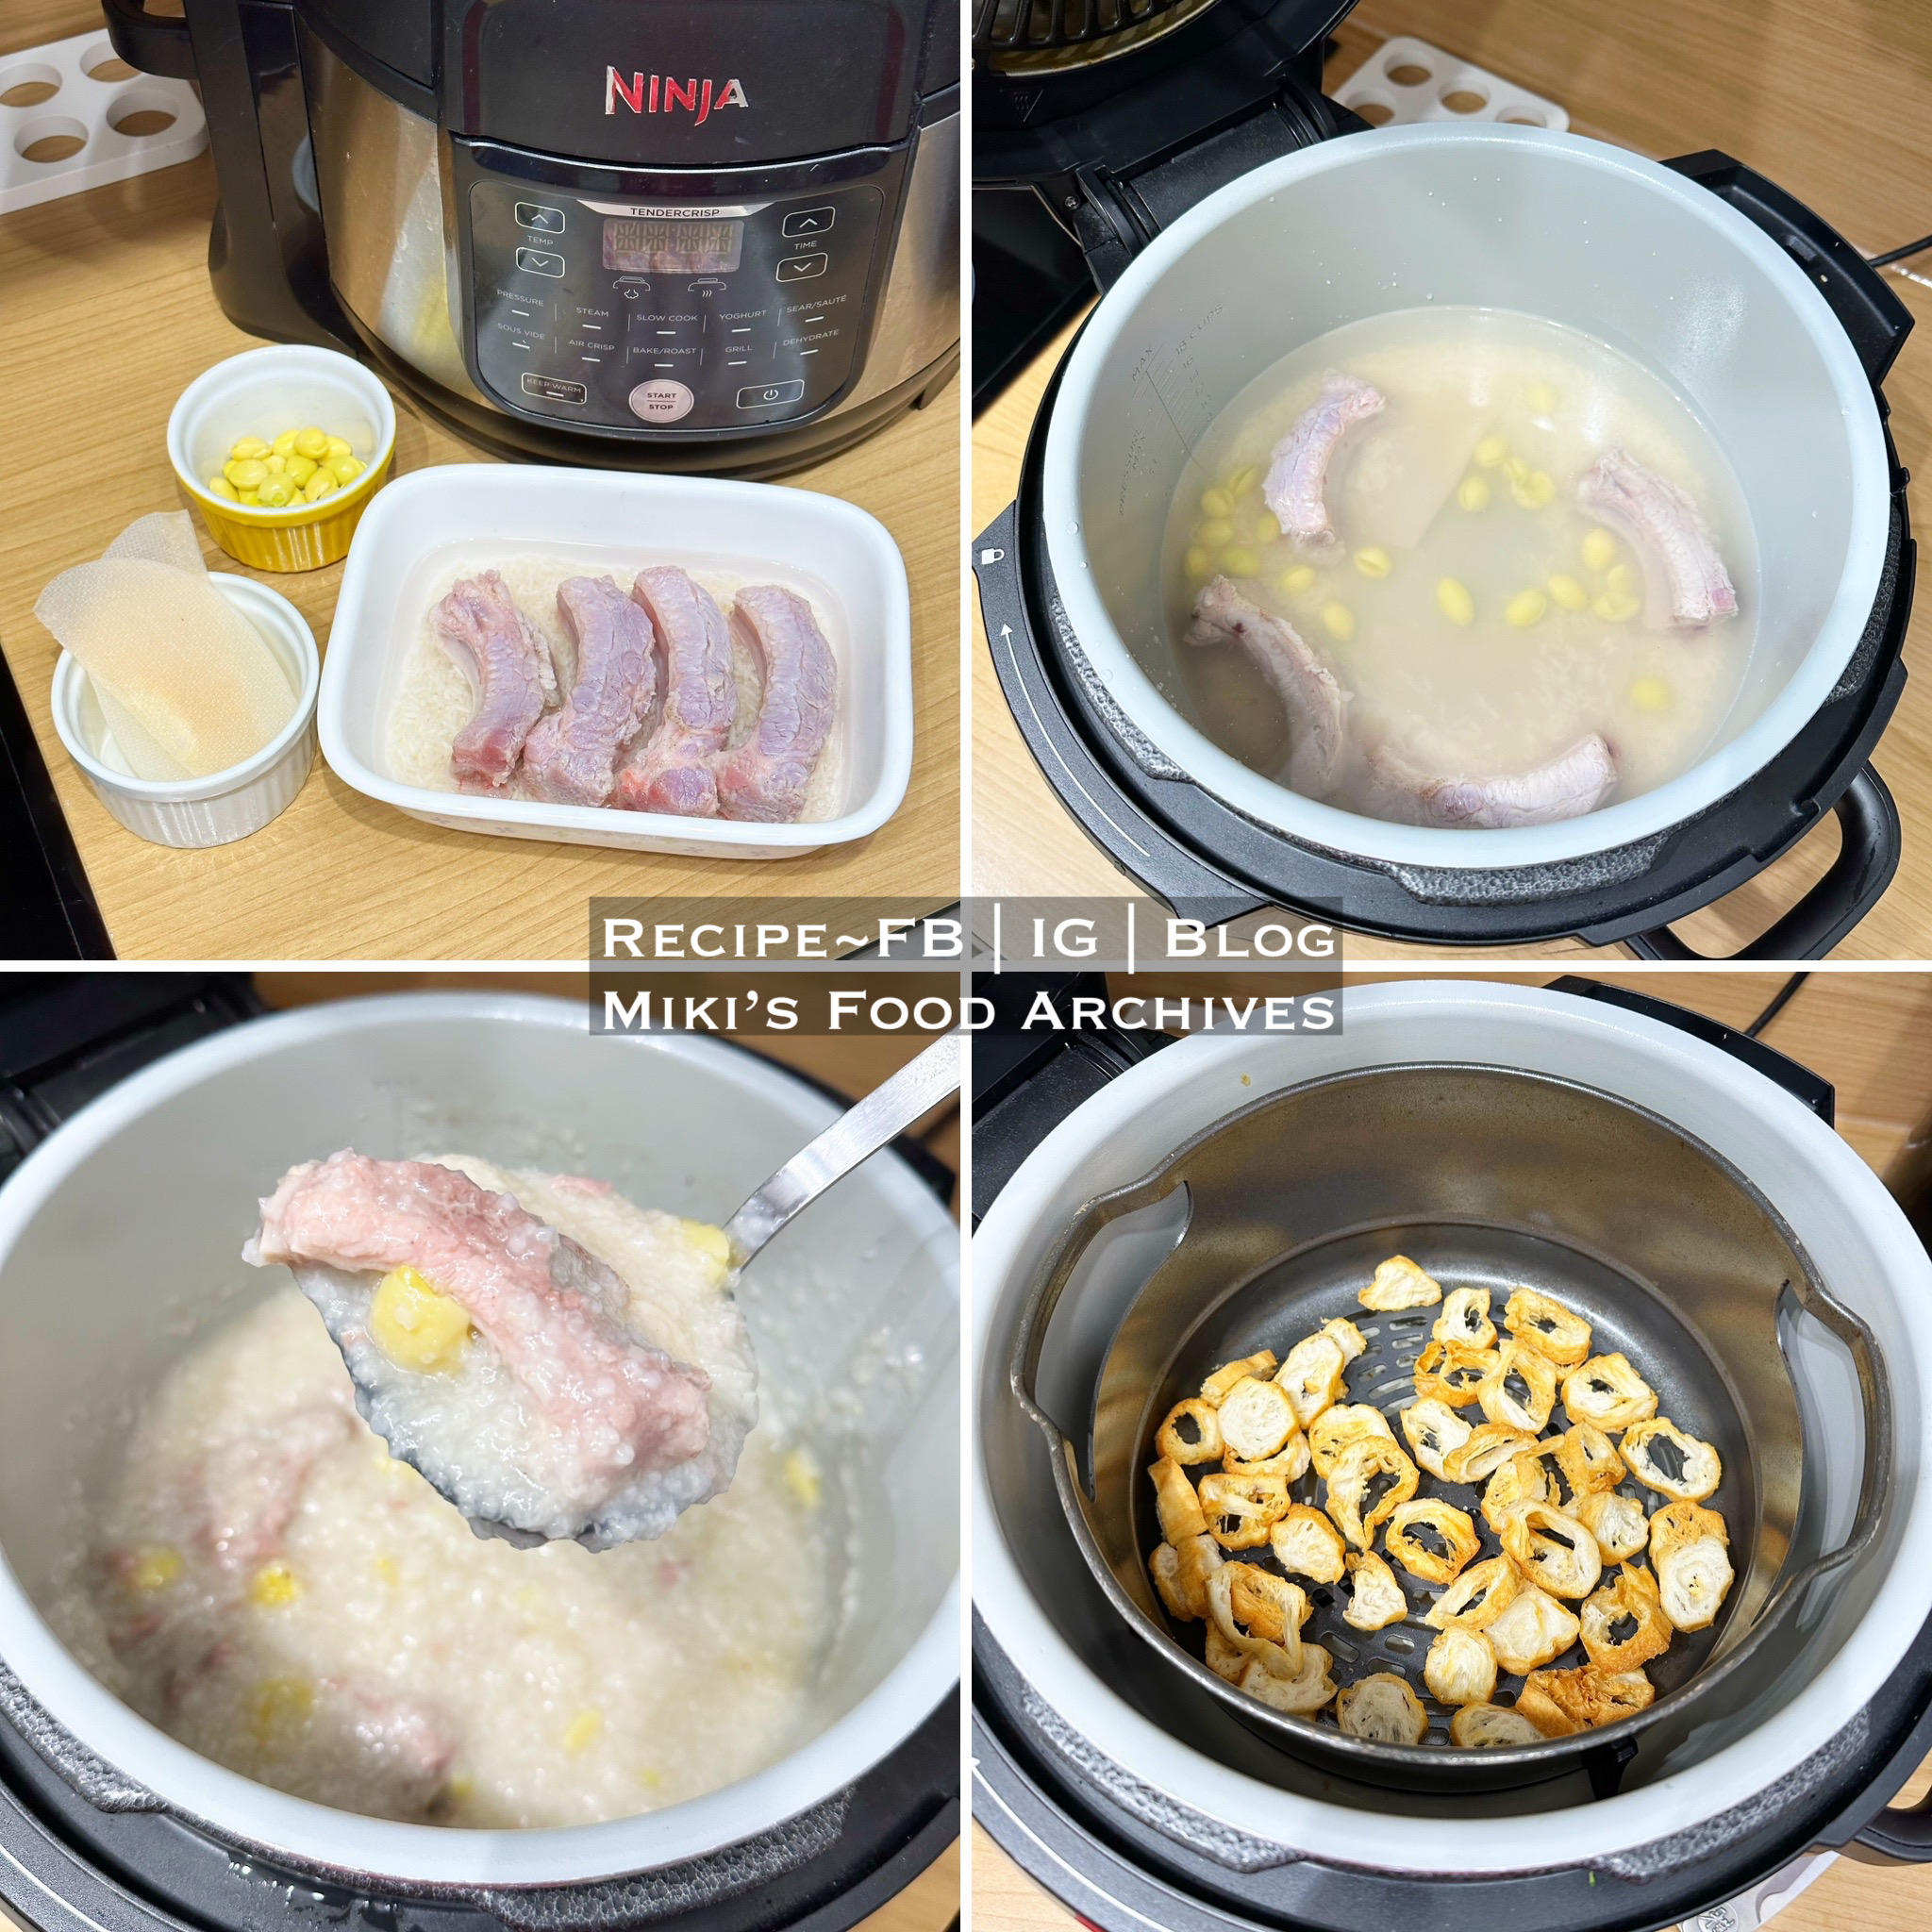
Pork Ribs Congee With Ginkgo Nut 白果排骨粥


This is an easy and healthy one-pot meal that is so satisfying to eat. Simply pressure cook the congee and air-fry the YouTiao till crispy to serve with the congee. It’s amazing how it tastes like the pork ribs congee have been cooked on the stove for a long period of time to achieve such tender meat and silky smooth congee. 


Ingredients: 
中文食谱:请在网页的右边点击Translate,然后选择中文翻译


3/4 *cup Jasmine Rice + 2 tbsp Glutinous Rice

(rinsed, and soaked for 30 minutes, or if you're cooking for breakfast, you can soak the rice the night before)


Water 6 cups level or enough to cover the ingredients 


4pcs Pork Ribs, blanched


20pcs Ginkgo Nut


1-2pcs Dried Whelk 


Some Salt & Pepper, add to taste


*Cup = the small measuring cup commonly used to measure rice.


If you are sharing this recipe/ blog content, kindly attach the link to this blog instead of screen capture/ copy & paste/ use in your blog. No parts of the content of this blog may be reproduced without prior written permission. All rights reserved. Thank you. 
如果您要分享此食谱/内容,请联系这个部落格的相关链接。敬请不要复制或改篇为自己的食谱。谢谢!

Method: 

1. Place all the ingredients (except salt) in the pot.

2. Close the pressure lid and seal. Set Pressure Cook (HI)for 30 minutes (NPR about 15-20mins).

Simply pressure cooks the congee and air-fry the YouTiao 

3. Add some salt and pepper to taste. Add your favourite toppings and serve warm. 
若喜欢我的食谱,可以LIKE和追随我的面书专页,不要错过最新食谱发布。If you like my recipe, click hereLIKE & follow Miki's Food Archives Facebook page or follow us on Instagram: mfa_dingoozatfood  to receive more recipe updates. Remember to favourite my pages if you wish to see my post on your feed. 


Friday, 5 May 2023

Pull-apart Soft Milk Bread 奶香手撕软面包


This fluffy and soft bread is truly a favourite, made using a simple sponge dough bread recipe that you can easily make your own tasty sweet milk buns at home. 


Ingredients:

中文食谱:请在网页的右边点击Translate,然后选择中文翻译


Sponge Dough: 


200g Bread Flour 


4g Instant Yeast


20g Milk Powder 


25g Egg (lightly beaten) 


100g Milk


Main Dough: 


65g Bread Flour 


45g Sugar 


1/2 tsp Salt 


30g Milk


30g Butter 


If you are sharing this recipe/ blog content, kindly attach the link to this blog instead of screen capture/ copy & paste/ use in your blog. No parts of the content of this blog may be reproduced without prior written permission. All rights reserved. Thank you. 如果您要分享此食谱/内容,请联系这个部落格的相关链接。敬请不要复制或改篇为自己的食谱。谢谢!


Method:


1. Mix together all sponge dough ingredients. Cover with cling wrap, let it proof for 1 hour. 


Note: Add more milk if the dough is too dry

2. Add in all main dough ingredients (except butter) to the sponge dough, knead to form a dough. Gradually knead in the butter. Continue kneading until the dough passes the windowpane test. 


3. Transfer the dough onto the worktop, shape and let it proof for 1 hour or double in size. Bake 170'C for 15 minutes. 


若喜欢我的食谱,可以LIKE和追随我的面书专页,不要错过最新食谱发布。If you like my recipe, click hereLIKE & follow Miki's Food Archives Facebook page or follow us on Instagram: mfa_dingoozatfood  to receive more recipe updates. Don't forget to favourite my pages if you wish to see my post on your news feed. 


Thursday, 4 May 2023

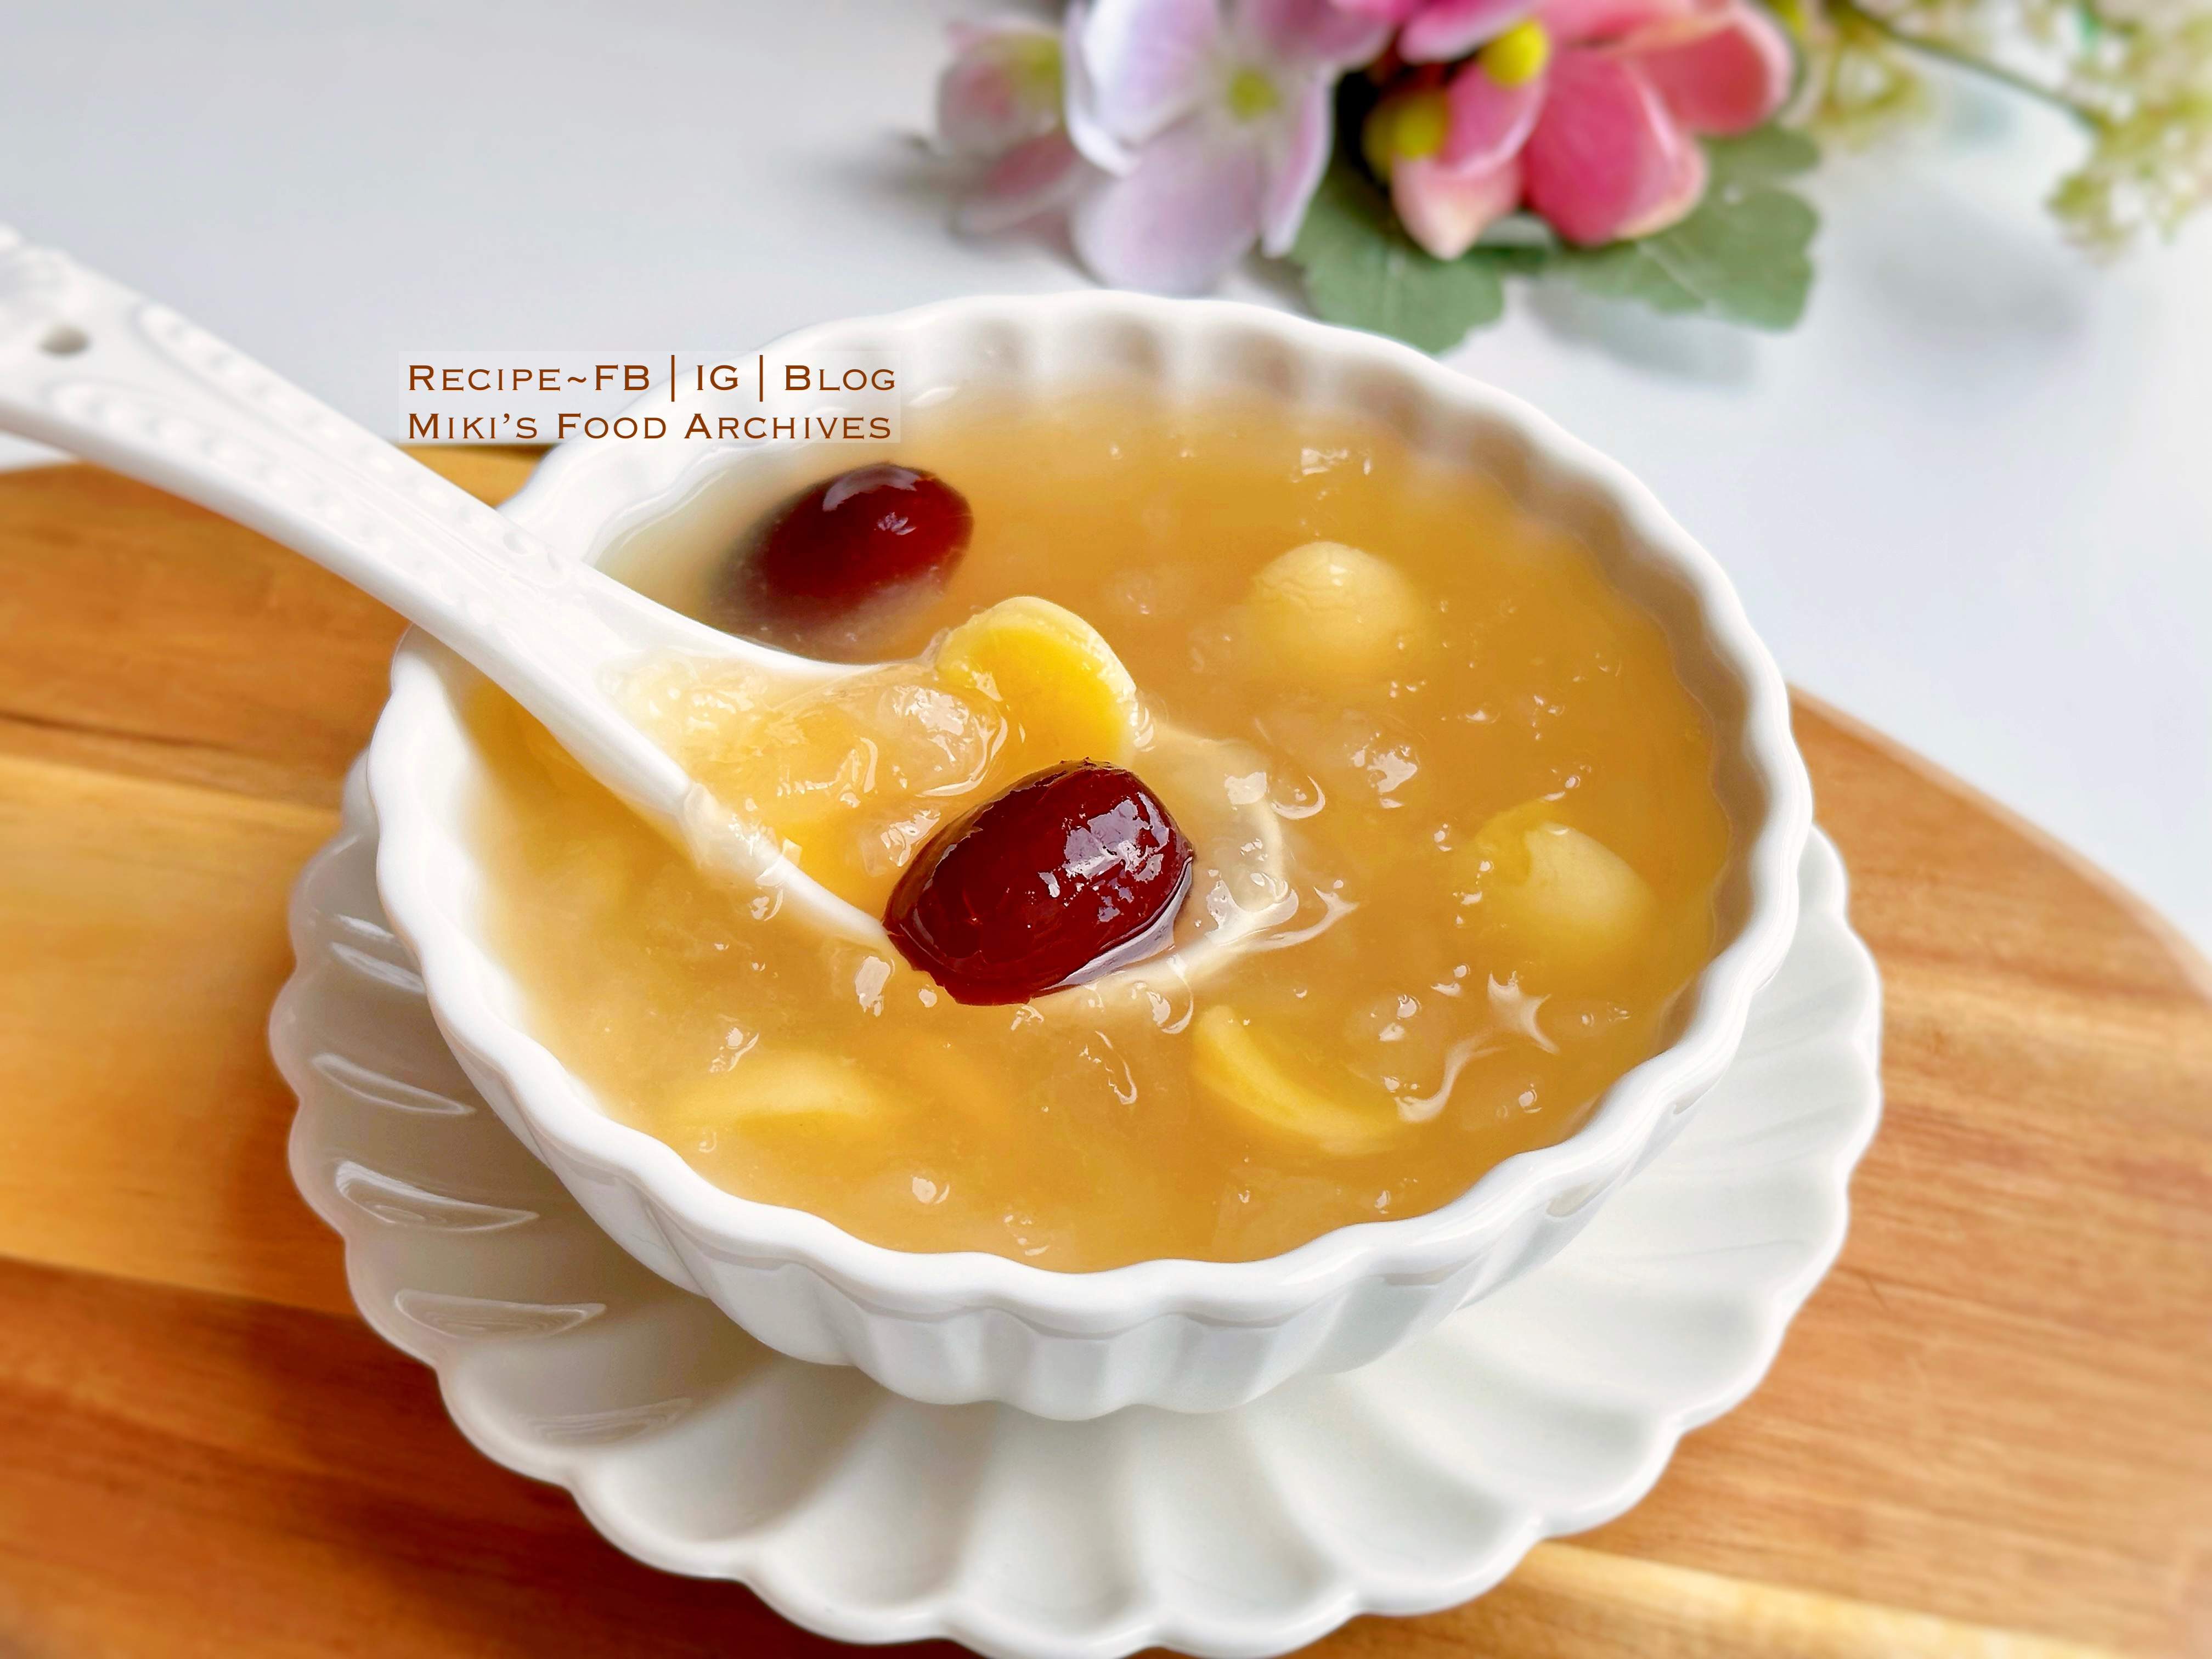
Hashima Ginkgo Nuts Dessert Soup 雪蛤白果糖水【滋阴润肺、排毒养颜】


Hashima/ Hasma aka "Suet Gap/ Xue Ge Gao/雪蛤膏" is known for its nourishing abilities to maintain youthful skin, strengthen the lungs and treat respiratory symptoms such as coughing. 

Hashima dessert soup is a delicacy in Chinese cuisine, this recipe uses ginkgo nuts, red dates and rock sugar, however, you can add more ingredients to suit your preferences. Dried Hashima can be purchased from TCM shops. Preparation is quite easy, simply soak the dried Hashima overnight, rinse and remove any impurities, and then follow the steps in the recipe below. 

Ingredients:
中文食谱:请在网页的右边点击Translate, 然后选择中文翻译

8g Hashima


100g Gingko Nuts


8 Red Dates


100g Rock Sugar, add to taste


1.5 litres Hot Water


If you are sharing this recipe/ blog content, kindly attach the link to this blog instead of screen capture/ copy & paste/ use in your blog. No parts of the content of this blog may be reproduced without prior written permission. All rights reserved. Thank you. 如果您要分享此食谱/内容,请联系这个部落格的相关链接。敬请不要复制或改篇为自己的食谱。谢谢!

Method:

1. Place all ingredients into Song Cho Claypot Rice Cooker. Cover with double lids set <SOUP> mode, 2 hours. 


2. When the cooker beep, serve warm or chilled. 

若喜欢我的食谱,可以LIKE和追随我的面书专页,不要错过最新食谱发布。
If you like my recipe, click hereLIKE & follow Miki's Food Archives Facebook page or follow us on Instagram: mfa_dingoozatfood  to receive more recipe updates. Don't forget to favourite the pages if you wish to see my post on your news feed. 

Enjoy!

Friday, 21 April 2023

Bandung Basque Burnt Cheesecake 双色玫瑰巴斯克芝士蛋糕


Basque Burnt Cheesecake is definitely one of my favourite baked cheesecakes because it's extremely easy to make. Previously I've made a few different flavours - vanilla, coffee, and Neapolitan. 

My son is a super fan of Sirap Bandung aka rose syrup milk. So this time, I added some rose syrup to half of the batter. The result is absolutely fantastic! The colour turned out so beautiful with a lovely pink layer and sweet rose aroma. My boy and I finished eating the whole cake in less than 24 hrs and we have to admit that this is our top favourite flavour for now! :P


If you'd like to try making it at home, tap the link below for the recipe.
If you are sharing this blog content, kindly attach the link to this blog instead of screen capture/ copy & paste/ use in your blog. No parts of the content of this blog may be reproduced without prior written permission. All rights reserved. Thank you. 如果您要分享此内容,请联系这个部落格的相关链接。敬请不要复制或改篇为自己的食谱。谢谢!
Thanks for reading, I hope you are inspired after reading my blog. If you love to see my food, click hereLIKE & follow Miki's Food Archives Facebook page or follow us on Instagram: mfa_dingoozatfood  to receive more recipe updates. Don't forget to favourite my pages if you wish to see my post on your news feed. 

Enjoy!

Sunday, 16 April 2023

Pumpkin Spiral Mantou/ Steamed Bun 双色南瓜小馒头


Thinking of making the usual mantou a little fancier? Try this simple spiral mantou aka steamed buns. These are soft and fluffy with a tad of sweetness. Made using fresh pumpkin for the bright natural colour. 


Ingredients: 

Yellow Pumpkin Dough:

65g Pumpkin Puree 南瓜泥 65克

10g Sugar 细砂糖 10克

1 tsp Oil 油 1小匙

150g Plain Flour/ Pau Flour 中筋面粉/包粉 150克

1/2 tsp Instant Dry Yeast 即溶酵母 1/2小匙

Some Milk 牛奶 适量

White Plain Dough:

150g Plain Flour/ Pau Flour 中筋面粉/包粉 150克

1/2 tsp Instant Dry Yeast 即溶酵母 1/2小匙

20g Sugar 细砂糖 20克

85g Cold Milk 冷牛奶 85克

1 tsp Cooking Oil 油 1小匙


If you are sharing this recipe/ blog content, kindly attach the link to this blog instead of screen capture/ copy & paste/ use in your blog. No parts of the content of this blog may be reproduced without prior written permission. All rights reserved. Thank you. 如果您要分享此食谱/内容,请联系这个部落格的相关链接。敬请不要复制或改篇为自己的食谱。谢谢!

Method: 步骤

1. Combine dough ingredients in separate bowls and knead until glossy and smooth. You can use a blender to knead the dough <<Click here to watch the dough preparation video tutorial>>
将所有面团材料分别揉成团至光滑。


2. Roll out the dough, place the white dough onto the yellow dough, roll it up and cut it into smaller pieces. Note: Use the picture above as a reference, brush some milk in between the dough.
分割后造型 - 把面团分别擀平,白色面团叠在黄色面团上面,然后卷起,切小块。可参考上图,面团之间要涂少许牛奶。

3. Let it proof double in size. Steam for 15 minutes. When it's done, turn off the heat. Let it sit for 5 minutes before removing/opening the lid. 
做好后发酵至双倍大。蒸15分钟。 蒸好后熄火,待5分钟才把馒头拿出, 即可享用。若喜欢我的食谱,可以LIKE和追随我的面书专页,不要错过最新食谱发布。

If you like my recipe, click hereLIKE & follow Miki's Food Archives Facebook page or follow us on Instagram: mfa_dingoozatfood  to receive more recipe updates. Don't forget to favourite my pages if you wish to see my post on your news feed. Enjoy!


Monday, 10 April 2023

Old-school Curry Potato Bun 古早味咖喱马铃薯软面包


This is one of my childhood favourite bread and now this has become my son's favourite. These soft and fluffy bread are stuffed with flavourful and aromatic curry filling, it's non-spicy and thus kid-friendly. A simple yet delicious treat for breakfast or snacks.


If you'd like to try making it at home, tap the link below for recipes.


Click here for Curry Potato Recipe << Easy Chicken Potato Dry Curry Recipe 鸡肉马铃薯咖喱馅食谱 >> 点击进入

If you are sharing this blog content, kindly attach the link to this blog instead of screen capture/ copy & paste/ use in your blog. No parts of the content of this blog may be reproduced without prior written permission. All rights reserved. Thank you. 如果您要分享此内容,请联系这个部落格的相关链接。敬请不要复制或改篇为自己的食谱。谢谢!

Thanks for reading, I hope you are inspired after reading my blog. If you love to see my food, click hereLIKE & follow Miki's Food Archives Facebook page or follow us on Instagram: mfa_dingoozatfood  to receive more recipe updates. Don't forget to favourite my pages if you wish to see my post on your news feed. 

Enjoy!

By readers: Some feedback from those who have tried this recipe

By Cheryl Ho


Monday, 3 April 2023

Spinach In Superior Broth With Century Egg & Salted Egg Yolk 上汤菠菜


Dian Xiao Er Restaurant-inspired spinach in superior broth with salted egg yolk, it's my son's favourite veggie dish to order whenever we dine at the restaurant over the weekends. I added some minced pork and century eggs as requested by the boy, tastes so good!

Ingredients:
中文食谱:请在网页的右边点击Translate,然后选择中文翻译

1 pkt Spinach


2 cloves Garlic


60g Ground Pork

(marinate with 1/4 tsp sesame oil, fish sauce/ light soy sauce and grated ginger)


2 Salted Egg Yolk


1 Century Egg


1 tbsp Rice Wine/ Mirin


285g Pork/ Chicken Broth


Some Salt & Pepper, add to taste


1 tbsp Wolfberries 


If you are sharing this recipe/ blog content, kindly attach the link to this blog instead of screen capture/ copy & paste/ use in your blog. No parts of the content of this blog may be reproduced without prior written permission. All rights reserved. Thank you. 

如果您要分享此食谱/内容,请联系这个部落格的相关链接。敬请不要复制或改篇为自己的食谱。谢谢!


Method:

1. 
Fill some water in a wok and bring it to a boil. Blanch the spinach and transfer to a serving plate, discard the water. Cut the spinach and set aside.

I cooked this dish using Song Cho stainless steel wok, a multi-ply stainless steel wok without chemical coating, it's safe to use in any cooking. 
For more information about the product, visit Song Cho e-shop for details.

2. Heat some oil, stir fry garlic until aromatic. Stir fry the marinated pork, add the salted egg yolk and century egg, stir fry for a few seconds then drizzle in cooking wine. 

3. Add broth, bring to a boil and simmer for a minute. Add salt and pepper to taste then add wolfberries and serve right away.

若喜欢我的食谱,可以LIKE和追随我的面书专页,不要错过最新食谱发布。
If you like my recipe, click hereLIKE & follow Miki's Food Archives Facebook page or follow us on Instagram: mfa_dingoozatfood  to receive more recipe updates. Remember to favourite my pages if you wish to see my post on your news feed. 

Enjoy!

Related Posts Plugin for WordPress, Blogger...