Click LIKE & follow us on Facebook for recipe updates

COOK WITH LOVE FOR A HAPPY HIM

Singapore home cooking/ baking/ food & recipe blog features more than 500 tried & tested, quick & easy kid friendly recipes with steps by steps tutorial.


Follow us on Instagram: mfa_dingoozatfood


If you're a company looking for possible collaboration, feel free to send me a message via Miki's Food Archives Facebook Fan Page or email to miki9mak@gmail.com


Search This Blog

Tuesday, 28 June 2016

Mashed Banana Fritters aka Jemput-Jemput Pisang/ Kueh Kodok 炸QQ香蕉球


Mashed Banana Fritters aka Jemput-jemput Pisang or Kueh Kodok was my school times favourite snacks sold at the Malay stalls. The traditional recipe uses just plain flour, banana, sugar, baking powder and salt. The texture is more solid, dense and crumbly. 


I like the traditional one when I was younger. Now I'm no longer a teenager with such good metabolism, eating such heavy food will last me whole day that I can't enjoy other food. Sad right? So I would prefer less oily and lighter food. Craving for this deep fried fritters but don't want heavy food? I must think out-of-the-box and do my food experiment again!


This recipe is especially customised for myself. Uses the mixture of 3 kinds of flour - Self Raising Flour, Rice Flour and Glutinous Rice Flour, yield puffy fritters, crispy from the outside and chewy in the inside. And most importantly, these fritters are not oily at all. I am so delighted to have created this awesome recipe and it's definitely the one that I'll be keeping and using again and again. 


Love the crispiness of this puffy banana fritters and it's chewy texture in the inside. 


Ingredients: 


1 Ripe Banana (peeled and mashed) 熟透的香蕉 1 条(压成泥)

1 tbsp Sugar  糖 1汤匙

Pinch of Salt 盐 少许

20g/ 2tbsp Self Raising Flour  20克 自发粉

10g/ 1tbsp Rice Flour 10克 粘米粉

*10g/ 1tbsp Glutinous Rice Flour 10克 糯米粉

Some oil for frying 油


Note: If you like it less chewy, replace *glutinous rice flour with self raising flour.


If you are sharing this recipe, kindly attach the link to this blog instead of screen capture/ copy & paste/ use in your blog and claimed as your recipe! Thank you.

如果您要分享此食谱,请联系这个部落格的相关链接。敬请不要复制或改篇为自己的食谱。谢谢!


Method:

1. Mix all ingredients in a bowl. 
把全部材料搅拌均匀。

2. Heat up oil in a saucepan to 160-170'C. Scoop the batter and carefully pour into the hot oil. 
烧热油,小心的把面糊分次倒入锅里。

3. Deep fry until golden brown. Enjoy!
炸至金黄色即可享用。若喜欢我的食谱,可以LIKE和追随我的面书专页,或追随 Instagram: mfa_dingoozatfood ,不要错过最新食谱发布。
If you like my recipe, click hereLIKE & follow Miki's Food Archives Facebook page or follow us on Instagram: mfa_dingoozatfood  to receive more recipe updates. Don't forget to change the setting to 'SEE FIRST' if you wish to see my post on your Facebook news feed. Enjoy!


Some feedback from those who have tried this recipe:


By Lee Carmen
By Zaliha Rashid


By Carol Koong 

By Wai Lin Yip 


Monday, 27 June 2016

Classic Vanilla Swiss Roll 经典香草蛋糕卷


This Swiss roll may look ordinary to you but it means a lot to me. 

It was the recipe that I used in my......

~ first time baking Swiss roll with my dad 

~ first time baking for 100pax for food tasting  

~ first baking demo


This Swiss roll was made using 5 egg recipe, with extra cream as requested by my boy.


First time baking with my dad 祝父亲大人~父亲节快乐

Last week when I was back in my hometown, I visited my dad and as usual, we chatted a lot sharing our cooking and baking stories. Yes, my dad is a great home baker! He is 75yo this year. The way he bakes is the no-recipe method and that's where I learnt to create new recipes. Perhaps I should say I'm lucky to have his gene...and I knew that gene was from my grandma. My grandma was in the generation that she could bake madeleine and cakes using a tin and charcoal. No oven, no electricity required. Alright, I think I should stop here else I'll be blogging my grandma's stories...

Back to my Swiss roll stories, yes, I was so happy that I got to bake with my dad for the first time. He whipped up the meringue with a hand whisk, and I did the rest of the work. No worries, my dad has strong muscle power! lol... The one that we made together, we did it without fresh cream because my parents don't eat cakes with cream. It was filled with his homemade Kaya and I can tell you, it tastes even better than the one with fresh cream! No Kaya Swiss roll photo was taken on that day because I always leave my phone in my bag when I spend time with my family. 


The naked swiss roll :) 


This is the first time baking for 100 pax for food-tasting


I was one of the volunteer bakers in the SHC anniversary event. Helped to bake some Swiss rolls for the food tasting session, with a live demo on the spot. 

These were the rolls that I started to bake on Saturday night at 10pm and ended my baking on Sunday at 2:30am. My very first ROLL AROUND THE CLOCK baking, although it's tiring but I enjoyed the process to the max until I forgot how many rolls I had baked! lol...Just baked more to be given out to my son's music school teachers and his friends :) 


First baking demo

I hardly put my 'face' in my blog post...This is probably the first one...


Yes, this is ME - Miki Mak, the author of this blog. 
ME (the first from left) with all the lovely people passionate about baking and cooking. 

This was the Swiss roll that I made during the demo, using the 4 eggs recipe which is the one that I'm sharing in this blog post. 


Ingredients:


(A)


4 Egg Yolk 蛋黄 4粒

33g Oil 油 33克


40ml Fresh Milk 牛奶 40克

1/2 tsp Vanilla Extract 香草精 半小匙

67g Cake Flour 低粉 67克


(B)

4 Egg White 蛋白 4粒

80g Castor Sugar 细砂糖 80克
(can be reduced for less sweet Swiss roll) 


(C)

Whipped Cream, click here for the whipped cream recipe or use topping cream. 鲜奶油,打发

Homemade Vanilla Swiss Roll. I'm still using the same recipe after so many years! Moist, soft and roll up easily without cracking! This recipe is simple enough for beginners.
Photo updated: April 2024. 

If you are sharing this recipe, kindly attach the link to this blog instead of screen capture/ copy & paste/ use in your blog. No parts of the content of this blog may be reproduced without prior written permission. All rights reserved. Thank you. 

如果您要分享此食谱,请联系这个部落格的相关链接。敬请不要复制或改篇为自己的食谱。谢谢!


Method:

Preheat oven 180'C. 
预热烤箱180度。

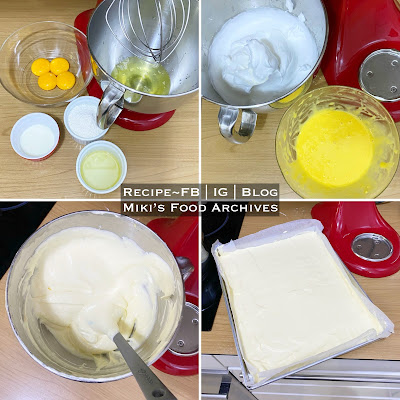
1. In a bowl, mix together egg yolk, oil, milk and vanilla extract. Sift in flour. Mix with a hand whisk to form a smooth paste, do not beat or over-mix the batter. 
把蛋黄,油,牛奶和香草精搅拌均匀。低粉过筛,慢慢加入,搅拌均匀。

2. In another mixing bowl, beat egg white until foamy, add sugar gradually. Beat until stiff and glossy. 
把蛋白打至松发,慢慢加入糖。打至硬性发泡。


3. Fold the meringue into the yolk mixture in 3 batches. 
分次把蛋白加入蛋黄糊,用刮刀搅拌均匀。不能过度搅拌。


4. Pour the batter onto a lined baking tray (28cm/ 11" x 35cm/ 14"). Spread the batter evenly. Gently tap 2-3 times on the worktop.  
倒入铺了油纸的烤盘(尺寸:28cm/ 11" x 35cm/ 14")。把烤盘轻轻在桌面敲2-3次。


5. Bake in a preheated oven for 13-15 minutes. Every oven is different, do adjust the baking temperature and time accordingly.
放进已预热的烤箱,烘烤13-15分钟。每个烤箱的温度不同,烘烤温度和时间须自行调整。

6. When it's ready, remove it from the oven, gently tap 2-3 times on the worktop. Place a baking sheet and cooling rack on the cake, flip it over.
烘烤后把蛋糕从烤箱里拿出,轻轻在桌上敲2-3次。蛋糕上面铺一张新的油纸,再放一个架子,然后小心的把烤盘倒反。


7. Remove the baking tray. Carefully remove the baking sheet. Roll up the cake while it's still warm. Here's a short video to show how I roll the cake:
把烤盘和油纸拿掉。把蛋糕卷起。(可以参考以下视频)


8. Let it cool completely on the rack. 
卷好后把蛋糕放在架子上待凉。


9. When it's completely cooled, unfold the cake. Add whipped cream and roll up again. Keep in the fridge for at least 1-2 hours before serving. 
慢慢打开蛋糕,涂一层鲜奶油,然后卷起,收冰箱 1-2 小时。冷却后即可享用。若喜欢我的食谱,可以LIKE和追随我的面书专页,不要错过最新食谱发布。
If you like my recipe, click hereLIKE & FOLLOW Miki's Food Archives Facebook page to receive more recipe updates. Don't forget to change the setting to 'SEE FIRST' if you wish to see my post on your Facebook news feed. Enjoy!


Some feedback from those who have tried this recipe:


By Judy Bakes 


By Jeannie Tay 
By Sue Anne
By Angela Koh

By Eileen Tan


By Katherine Tan
By Katherine Tan
By Shen Cui Ling

By Shen Cui Ling

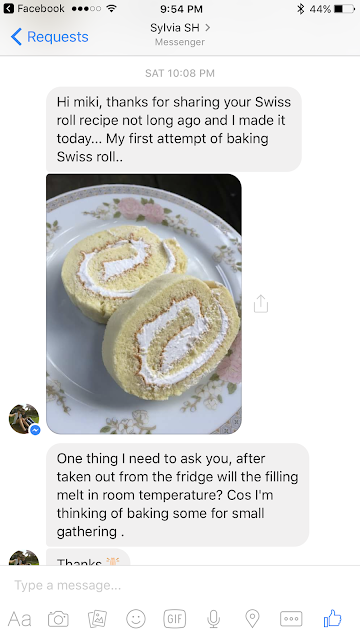
By Sylvia SH, her first attempt baking swiss roll. 


By Reigne Aniger


By Chris Then 
By See Ling


By Loraine Loren


By Vanessa Tay 


By Sharon Low


By Cassandra Xu


By Cassandra Xu


By Fong Meei Khee

By June-Lin Neoh


By Lisa Yip


By Kel Sya


By Lisa Yip

By Jeannie Lee  

By Lynn Teng

By Eileen Tan

By Liz Lim

By luvcheescake

By Suat Pheng Tan

By Lina Ong

By Eliza Lim


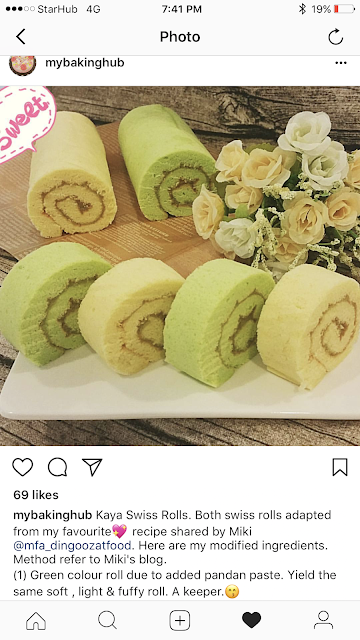
by mybakinghub

By Eileen Tan

By Kelly Yip

By Jeannie Lee

By Janet Gerrard

By Christine Tan

by Kel Sya

by Rosalind Ang


Related Posts Plugin for WordPress, Blogger...