Click LIKE & follow us on Facebook for recipe updates

COOK WITH LOVE FOR A HAPPY HIM

Singapore home cooking/ baking/ food & recipe blog features more than 500 tried & tested, quick & easy kid friendly recipes with steps by steps tutorial.


Follow us on Instagram: mfa_dingoozatfood


If you're a company looking for possible collaboration, feel free to send me a message via Miki's Food Archives Facebook Fan Page or email to miki9mak@gmail.com


Search This Blog

Showing posts with label Video/ Tutorial. Show all posts

Thursday, 30 July 2026

Crispy Apam Balik (Peanut Pancake) ~ Sweet & Savoury Versions 香脆曼煎糕【薄脆皮】


Deliciously crispy Apam Balik ~ a fun local favourite to make this National Day period! 🇸🇬❤️

Apam Balik has always been one of my favourite treats from the pasar malam when I was a child. I still remember enjoying the crispy edges, sweet peanut filling, and that irresistible aroma coming from the freshly made pancakes.

This time, I’m making my all-time favourite sweet and crispy apam balik with classic fillings like peanut, sugar and cream corn, along with a savoury version filled with ham and cheese. 

The step-by-step video is available on my latest IG Reel. Let’s make these crispy apam balik at home, a nostalgic treat that will surely capture everyone’s heart. Click here to watch how I make it, step by step. 

Ingredients:中文食谱:请在网页的右边点击Translate, 然后选择中文翻译

Apam Balik Batter

  • 2 Eggs
  • 300g Water
  • 145g All-purpose flour
  • 75g Rice flour
  • 1 tsp Baking soda
  • ¼ tsp Salt
  • 45g Sugar
  • 1 tsp Instant yeast

Sweet Filling

  • Ground peanuts
  • Sugar
  • Cream corn
  • Shredded cheese

Savoury Filling

  • Ham
  • Cheddar Cheese (1–2 slices, or as desired)
  • Chilli sauce or tomato sauce
  • Fresh greens 

If you are sharing this recipe/ blog content, kindly attach the link to this blog instead of screen capture/ copy & paste/ use in your blog. No parts of the content of this blog may be reproduced without prior written permission. All rights reserved. Thank you. 

如果您要分享此食谱/内容,请联系这个部落格的相关链接。敬请不要复制或改篇为自己的食谱。谢谢!

Method: 

1. Lightly whisk the eggs in a mixing bowl. Add water and stir to combine. Sift in the all-purpose flour, rice flour, baking soda, salt and sugar. Add instant yeast, then mix. Pour the batter through a sieve to get a smooth batter. Cover and let the batter rest for 30 minutes. Heat a non-stick pan over low heat. Pour in the batter, and add your favourite fillings.

After pouring in the batter, lift and swirl the pan gently so that a thin layer of batter spreads towards the edges. This creates the signature crispy rim.  A thinner batter layer helps create crispier edges.

Sweet Version: 

Sprinkle ground peanuts, sugar, cream corn and shredded cheese (if using) over the pancake. Cover with a lid until the cheese melts.

Savoury Version:

Add Cheddar Cheese, ham and your choice of chilli sauce or tomato sauce. Cover with a lid until the cheese melts. Top with fresh greens.

Fold and serve warm and enjoy the crispy edges with the delicious sweet or savoury fillings! Adjust the fillings according to your preference, that's the fun part of making homemade apam balik! The full cooking video is on my Instagram Reel若喜欢我的食谱,可以LIKE和追随我的面书专页,不要错过最新食谱发布。If you like my recipe, click hereLIKE & follow Miki's Food Archives Facebook page or follow us on Instagram: mfa_dingoozatfood  to receive more recipe updates. Remember to favourite my pages to see my posts on your news feed. Enjoy!


Thursday, 8 February 2024

Homemade Cute Dragon Yu Sheng aka Prosperity Toss/ Yee Sang/ LoHei CNY2024 萌龙造型鱼生|龙年新年捞起必备


Leap into the Year of Dragon with a dragon-themed Yu Sheng, a perfect toss to usher in an abundant year! 


Cute Dragon-shaped Prosperity Toss/ Yu Sheng/ Yee Sang/ Lohei
Specially created for the Year of the Dragon 可爱龙龙造型鱼生

Presenting my first Dragon-shaped Yu Sheng creation, I’m so delighted with the outcome. I made this cute dragon Yu Sheng using mainly fruits, veggies and corn chips. Tap the link below to get the recipe and watch the video tutorial:


If you are sharing this recipe/ blog content, kindly attach the link to this blog instead of screen capture/ copy & paste/ use in your blog. No parts of the content of this blog may be reproduced without prior written permission. All rights reserved. Thank you. 如果您要分享此食谱/内容,请联系这个部落格的相关链接。敬请不要复制或改篇为自己的食谱。谢谢!

Thanks for reading, I hope you are inspired after reading my blog. If you love to see my food, click hereLIKE & follow Miki's Food Archives Facebook page or follow us on Instagram: mfa_dingoozatfood  to receive more recipe updates. Remember to favourite my pages if you wish to see my posts on your news feed. 

Enjoy!


Friday, 22 December 2023

Easy Baked Potato With Ham & Cheese 芝士火腿焗马铃薯


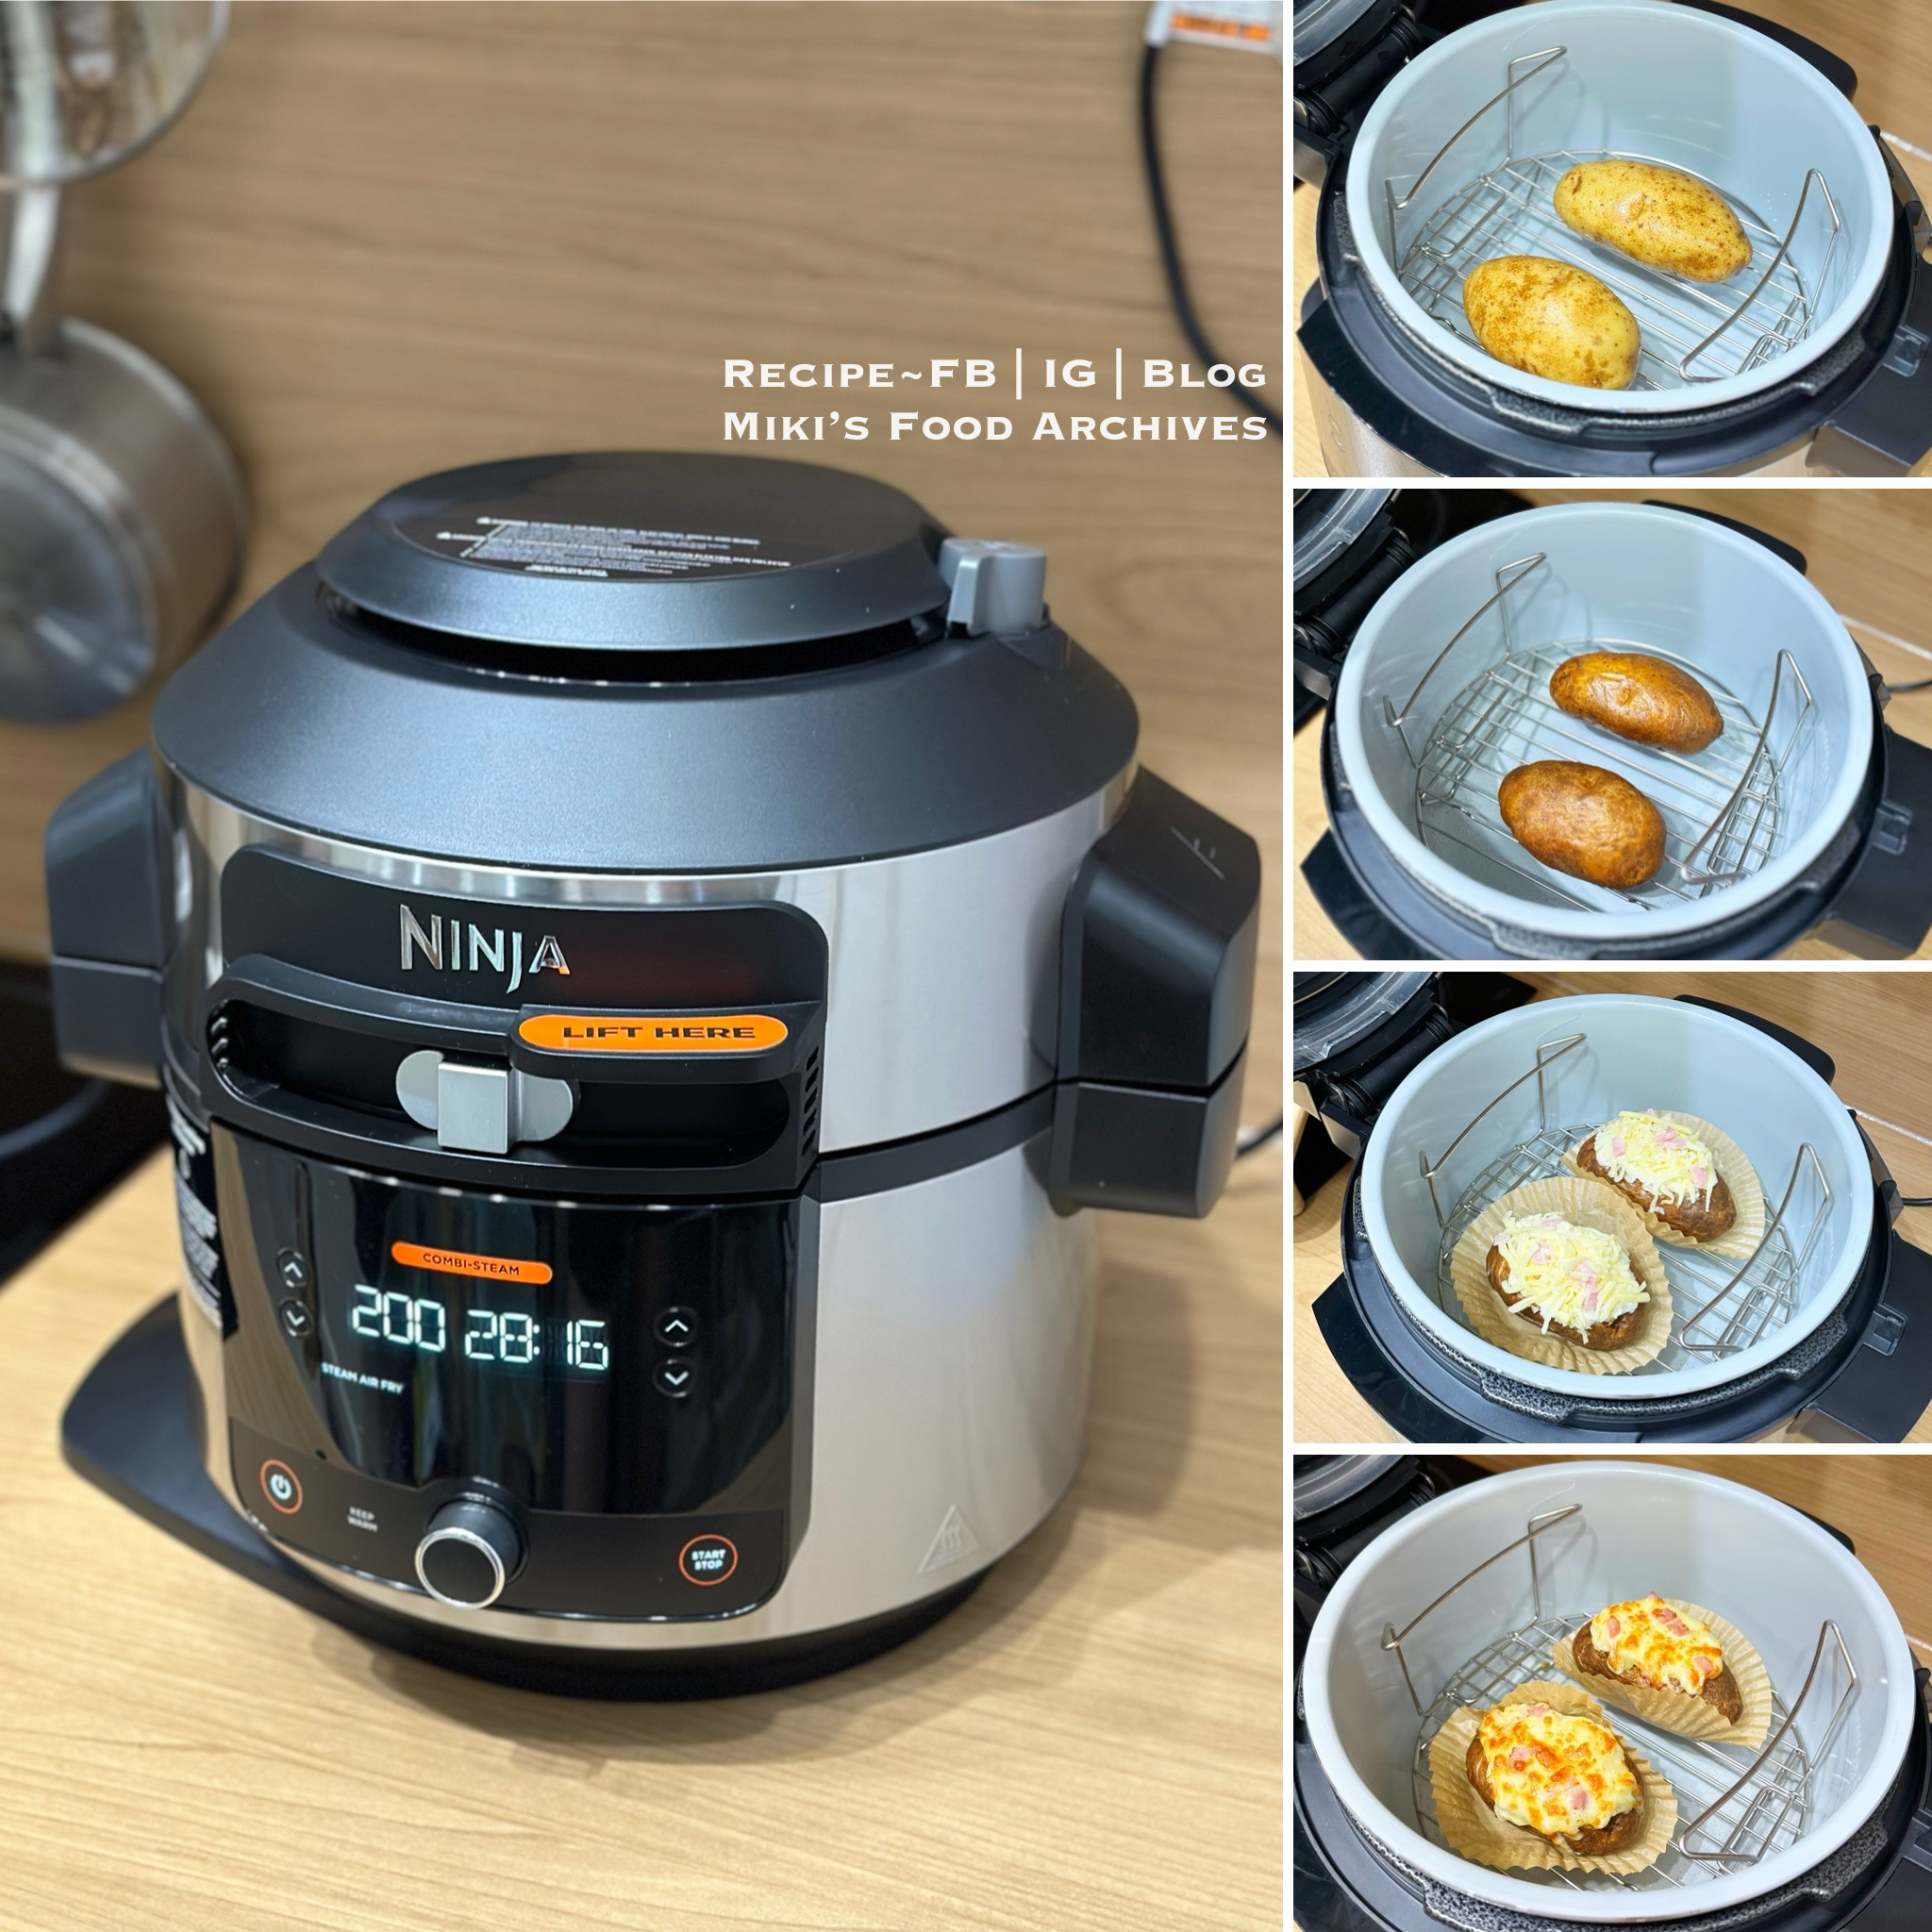
This ham and cheese baked potato is a great side dish served with your lunch and dinner or as a light meal on its own. While a baked potato made in an oven is undeniably good, a baked potato is even more scrumptious when it’s made in Ninja Foodi 11-in-1 SmartLid Multi-Cooker using the new innovative Combi Steam cooking function that crisps the skin of the potato to perfection while also creating moist, tender and fluffy insides, all ready in a fraction of the time (35 minutes in Ninja Foodi VS 2 hours in oven)


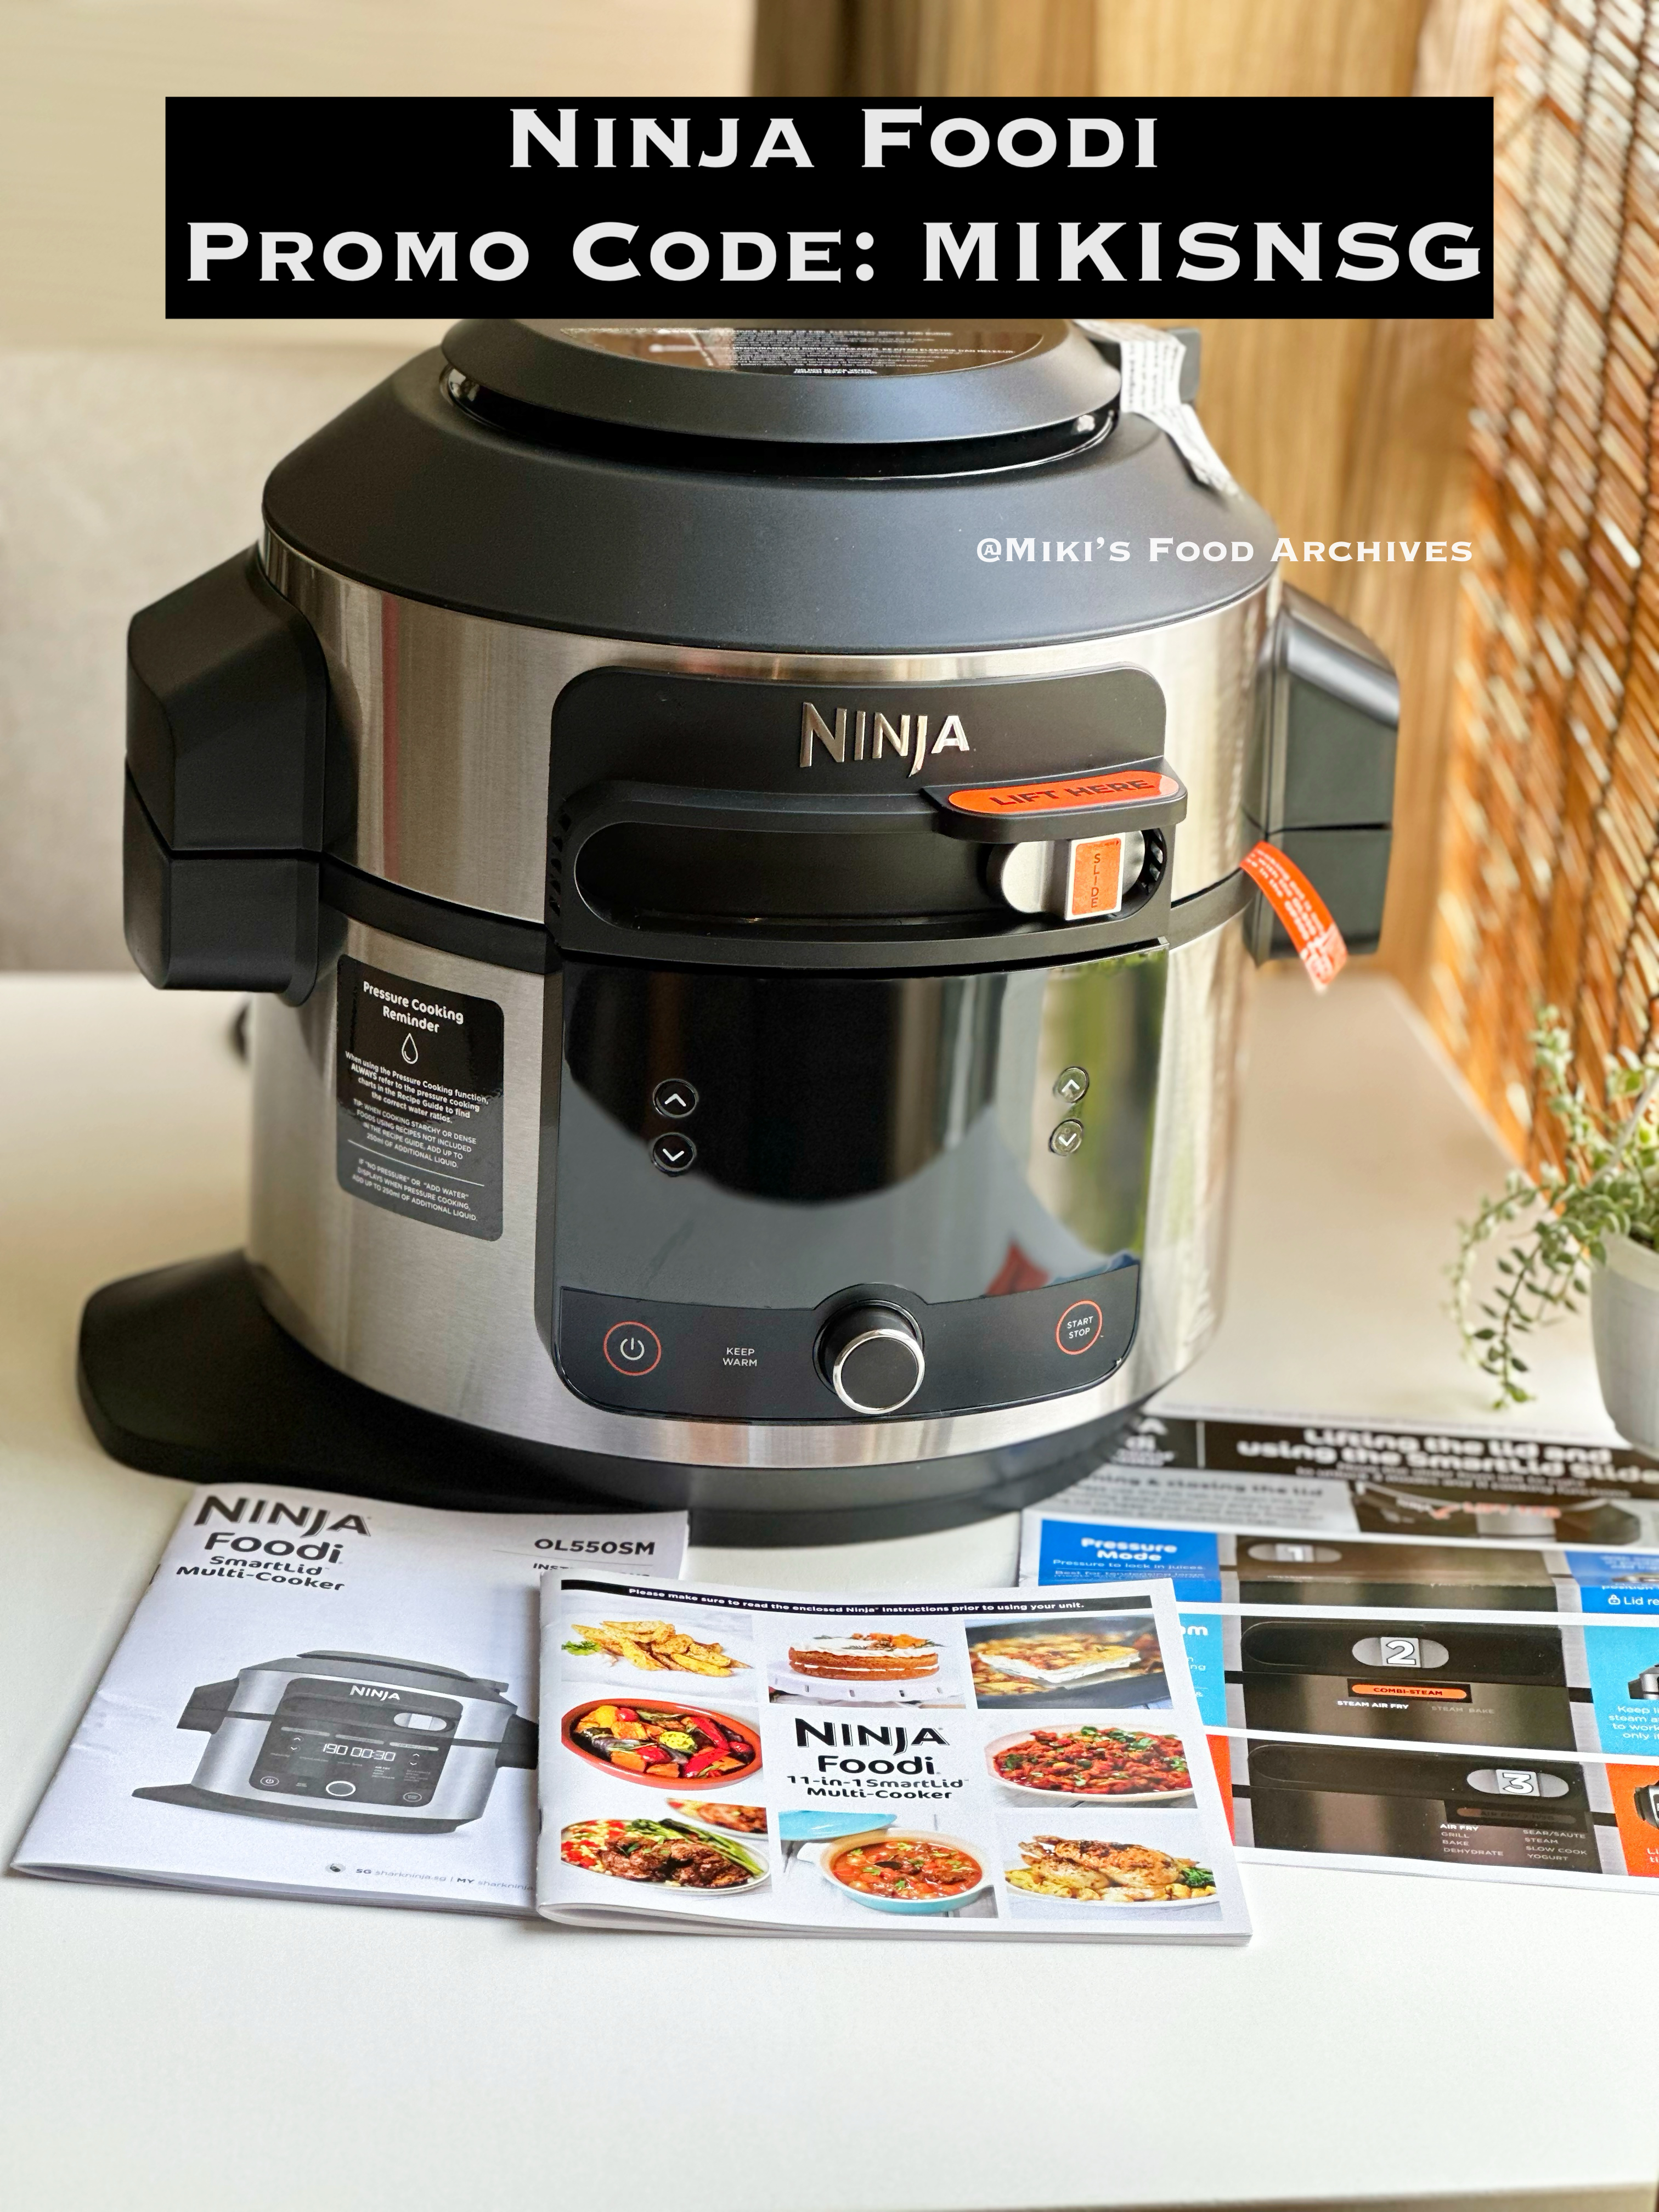
About Ninja Foodi 11-in-1 SmartLid Multi-Cooker: Featuring a remarkable 11-in-1 functionality that includes: Pressure Cook, Air Fry, Grill, Bake, Dehydrate, Sear/Sauté, Steam, Slow Cook, Yoghurt, and two new innovative Combi-Steam functions - Steam Air Fry and

Steam Bake. The multi-cooker incorporates a new SmartLid Technology that allows one to toggle easily between the different cooking functions at one go, all under a single cooker lid. 

Ninja Foodi 11-in-1 SmartLid Multi-Cooker OL550 
Cart out with Promo Code: 
MIKISNSG to get a 10% discount for this new arrival and any Ninja-Shark products via Ninja Kitchen Official Website


The new multicooker is set to equip one with the ability to cook an even greater variety of healthy and delectable dishes effortlessly, which is easy to use and helps save time by simplifying cooking routines. Furthermore, the pressure cooking and air frying in one pot is now under one SmartLid that you can start with Pressure mode and then slide to Air Fry mode without having to swap lids which saves on storage. If interested, you can use our exclusive discount code to buy at the best market rate. Cart out with Promo Code: MIKISNSG to get a 10% discount for this new arrival and any Ninja-Shark products via Ninja Kitchen Official Website

Ingredients: 
中文食谱:请在网页的右边点击Translate,然后选择中文翻译

2 Russet Potatoes - cleaned, rub with cooking oil and some salt if needed.

2 tbsp Cooking Cream


1/2 tbsp Mayonnaise 


2 tbsp Ham, plus more for toppings


Salt and pepper, add to taste


1-2 tbsp Shredded Cheese, plus more for toppings


If you are sharing this recipe/ blog content, kindly attach the link to this blog instead of screen capture/ copy & paste/ use in your blog. No parts of the content of this blog may be reproduced without prior written permission. All rights reserved. Thank you. 
如果您要分享此食谱/内容,请联系这个部落格的相关链接。敬请不要复制或改篇为自己的食谱。谢谢!

Method: 

1. Steam Air Fry the potatoes 200'C for 30 minutes using the Ninja Foodi 11-in-1 SmartLid Multi-Cooker. The Combi-Steam modes combine steam and convection to produce juicy,
speedy and crispy results. 
Ninja Foodi 11-in-1 SmartLid Multi-Cooker OL550 comes with Steam Air Fry, Steam Bake, Air Fry, Bake/Roast, Grill, Pressure Cook, Steam, Slow Cook, Dehydrate, Sear/Sauté, Yoghurt and Keep Warm functions. 
Cart out with Promo Code: 
MIKISNSG to get a 10% discount for this new arrival and any Ninja-Shark products via Ninja Kitchen Official Website


2. Remove the inner part of the potatoes, mash and mix with the remaining ingredients. Top each potato with more cheese and ham, bake in the Ninja Foodi 180'C for about 5 minutes. CLICK HERE to watch the cooking video.

<< Click HERE >> to view more Ninja Foodi recipes and cooking videos, including easy one-pot-meal, chicken curry, roast chicken, roast pork ribs, crispy chicken, porridge, fish recipes, bread, kid-friendly snacks, and many more...

若喜欢我的食谱,可以LIKE和追随我的面书专页,不要错过最新食谱发布。If you like my recipe, click hereLIKE & follow Miki's Food Archives Facebook page or follow us on Instagram: mfa_dingoozatfood  to receive more recipe updates. Remember to favourite my pages to see my recipe posts on your news feed. Enjoy!


Sunday, 22 January 2023

Cute Bunny Rabbit Steamed Bun With Peanuts & Black Sesame Fillings 萌兔花生黑芝麻包子 【Easy Blender Recipe】


Happy Lunar New Year! May your year of the rabbit be full of happiness, good health and luck! 祝你兔年幸福安康!

These soft and fluffy steamed buns are filled with peanuts and black sesame paste, shaped into cute little bunnies to usher in the year of the rabbit in the Chinese Zodiac.

Watch the making of Bunny Steamed Bun video/ tutorial 萌兔包子制作视频:


Ingredients: 

90g Cold Milk 冷牛奶 

20g Sugar 细砂糖 

1 tsp Oil 花生油

150g Plain Flour/ Pau Flour 中筋面粉/包粉 


1/2 tsp Instant Dry Yeast 即溶酵母 


Peanuts & Black Sesame Fillings 黑芝麻馅:


40g Toasted Black Sesame Seeds 炒香黑芝麻 


40g Toasted Peanut 花生


85g Castor Sugar 细砂糖 


50g Salted Butter (or use ground nut oil/ lard with some salt, adjust the amount accordingly)  含盐牛油/花生油/ 猪油 


Bunny steamed buns for breakfast🐰💕 
Compared with the one I made at the end of rabbit year, they are happier getting off work😍  
认真工作了一整年,兔兔开开心心地准备下班咯!希望大家也一样愉悦地迈进甲辰龙年🐲
Photo updated: Jan 2024


If you are sharing this recipe/ blog content, kindly attach the link to this blog instead of screen capture/ copy & paste/ use in your blog. No parts of the content of this blog may be reproduced without prior written permission from Miki's Food Archives. All rights reserved. Thank you. 如果您要分享此食谱/内容,请联系这个部落格的相关链接。敬请不要复制或改篇为自己的食谱。谢谢!

Method: 步骤

1. Process the black sesame seeds and peanuts separately in a grinder, follow the steps in the video tutorial. Mix all filling ingredients to form a paste, add more oil if needed. 
黑芝麻和花生搅碎,与馅料食材混合。冷藏后揉成小球备用。


2. Chill the paste then divide and roll into small balls. 

3. Meanwhile, prepare the dough. Place the dough blade into the processor pitcher. Add in all the dough ingredients. Select the DOUGH function to knead the dough.
将其它材料放进搅拌机搅拌成团


I used the spice & coffee grinder to grind the black sesame seeds and finely chopped the peanuts


4. When the dough is ready, transfer the dough onto the floured tabletop, knead for a few minutes till smooth. Divide dough, roll into small balls. Roll out the dough, wrap in fillings and shape into bunny rabbit.
取出面团加少许面粉揉至光滑。分割,包入馅料后造型。


5. Let it proof for about 50 minutes or double in size. Steam for 15 minutes. When it's done, turn off the heat. Let it sit for 5 minutes before removing the lid. 
做好后发酵50分钟或双倍大。蒸15分钟。 蒸好后熄火,待5分钟才把包子拿出。待凉后即可享用。若喜欢我的食谱,可以LIKE和追随我的面书专页,不要错过最新食谱发布。If you like my recipe, click hereLIKE & follow Miki's Food Archives Facebook page or follow us on Instagram: mfa_dingoozatfood  to receive more recipe updates. Don't forget to favourite my pages if you wish to see my post on your news feed. 


Friday, 11 November 2022

Easy Potato Pancake aka Rosti Recipe 香煎瑞士马铃薯饼


Rosti aka potato pancake, originating from Switzerland is made of shredded potatoes pan-fried in a skillet until golden and crisp, usually serve as a main or side dish. My son loves Rosti at Marche but after seeing the amount of oil they use to cook the Rosti, it's a NO for us! 

When the boy was younger, I often made Rosti at home for our weekend breakfast. Making it from scratch isn't difficult but it can be tedious if you're grating the potatoes manually. I would highly recommend using a food processor to grate the raw potatoes, it's so much faster and safe! Need not worry about hurting your fingers or fingernails. If you've tried using a box grater, you'll know what I mean :P


Ingredients: 
中文食谱:请在网页的右边点击Translate,然后选择中文翻译

3 Potato


1/2 tsp Garlic Salt


1/4 tsp Onion Powder


1/8 tsp Pepper


If you are sharing this recipe/ blog content, kindly attach the link to this blog instead of screen capture/ copy & paste/ use in your blog. No parts of the content of this blog may be reproduced without prior written permission from Miki's Food Archives. All rights reserved. Thank you. 

如果您要分享此食谱/内容,请联系这个部落格的相关链接。敬请不要复制或改篇为自己的食谱。谢谢!


Method: 

1. Peel and shred the potatoes.


2. Add in seasonings, and discard excess liquid. Don't worry if your potatoes go brown or reddish, this is a natural reaction of potatoes to air aka oxidation. It does not affect the taste. 
Optional: Divide the shredded potatoes into 4 portions, making smaller rosti shorten the cooking time. 

3. Heat some oil and pan-fry both sides until crisp and cooked through. Serve with sour cream, chilli sauce or any of your favourite toppings.若喜欢我的食谱,可以LIKE和追随我的面书专页,不要错过最新食谱发布。If you like my recipe, click hereLIKE & follow Miki's Food Archives Facebook page or follow us on Instagram: mfa_dingoozatfood  to receive more recipe updates. Don't forget to favourite my pages if you wish to see my post on your news feed. 


Thursday, 29 September 2022

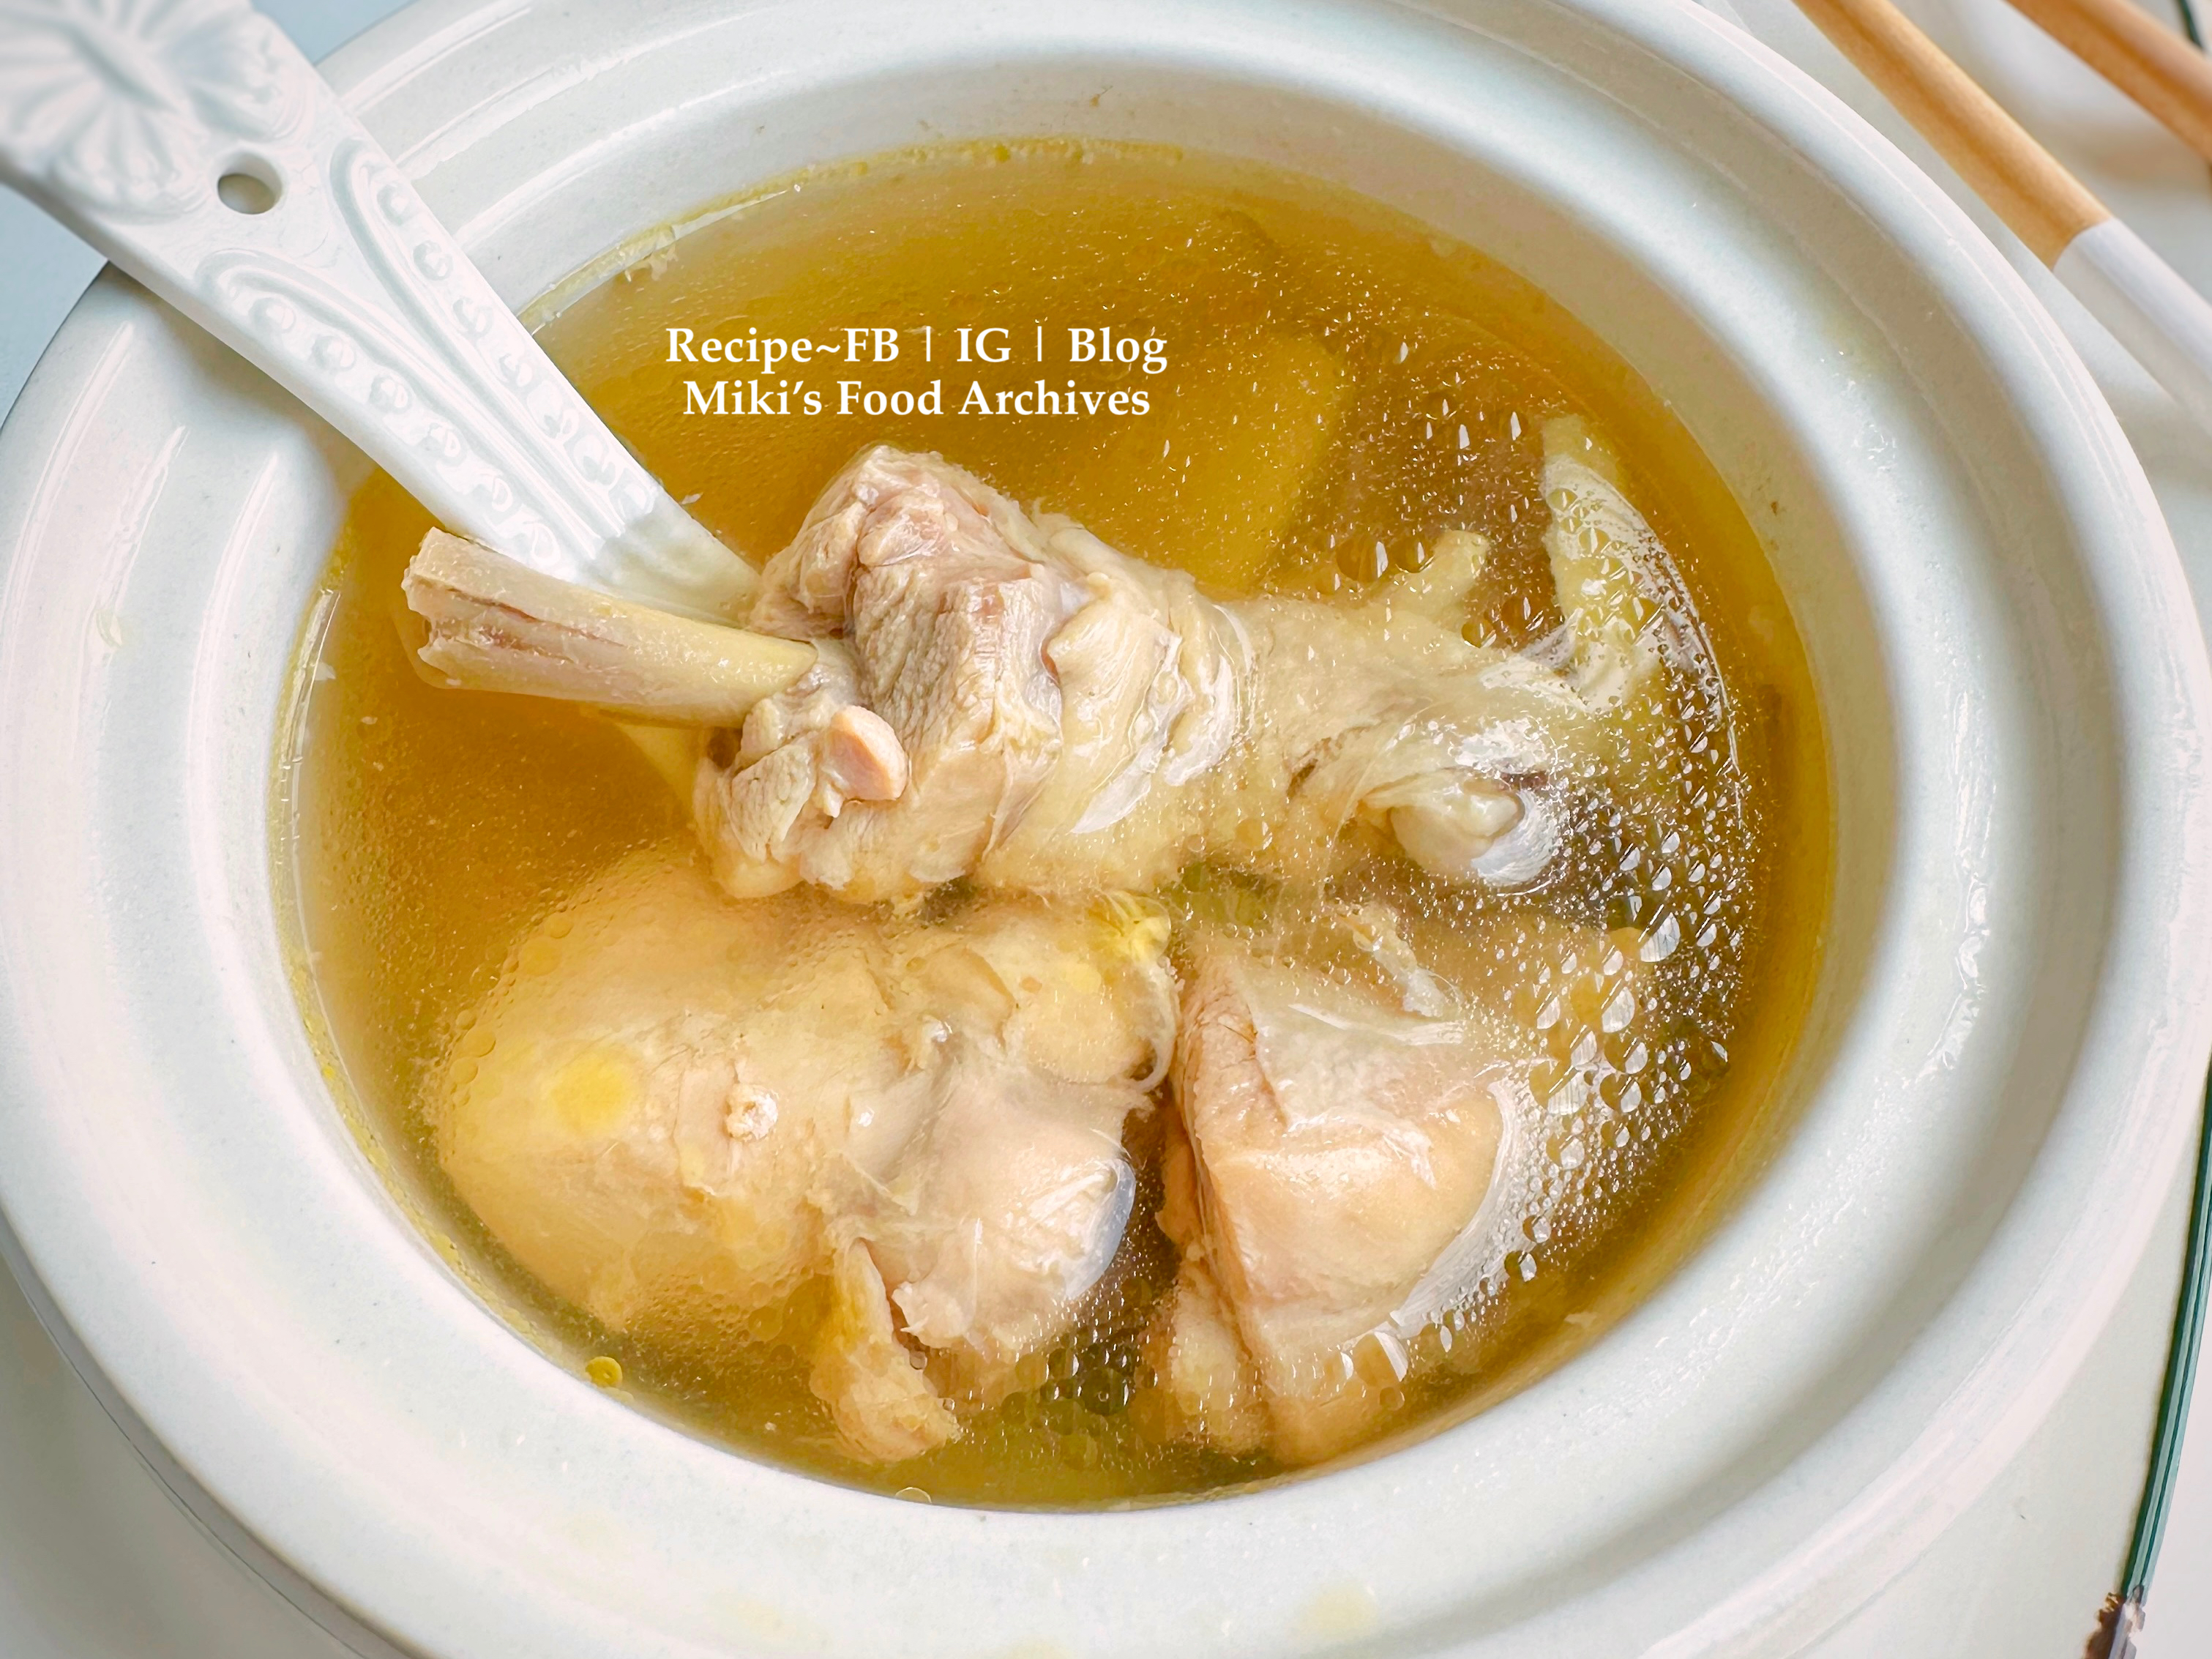
Copycat Din Tai Fung Steamed Chicken Soup 元盅鸡汤【鼎泰丰风味家常做法】


My son is a superfan of Din Tai Fung restaurants, he loves their fried rice, dumplings, prawn pancakes, and steamed soup. Thus, it's one of our favourite restaurants to dine in over the weekends since he was a toddler. And, he'd ask me to replicate DTF food at home! 😅

Previously I've tried replicating their prawn pancakes and Xiao Long Bao. This time, I tried making their steamed chicken soup 元盅鸡汤 and I'm happy that my son loves it and he says "very nice mummy, it tastes like Din Tai Fung steamed soup". 


Preparation is easy with a few simple ingredients, here's sharing a time-saving shortcut method to prep this delicate yet flavourful chicken soup.

Ingredients: 
中文食谱:请在网页的右边点击Translate,然后选择中文翻译

1 Kampong Chicken Leg, blanched

1 stalk Spring Onion

2-3 slices Ginger

1 Scallop, optional (if using large chicken leg, omit this)

300g Hot Water

Marinade:

1/2 tbsp Rice Wine

1/2 tsp Salt, or add to taste


If you are sharing this recipe/ blog content, kindly attach the link to this blog instead of screen capture/ copy & paste/ use in your blog. No parts of the content of this blog may be reproduced without prior written permission. All rights reserved. Thank you. 

如果您要分享此食谱/内容,请联系这个部落格的相关链接。敬请不要复制或改篇为自己的食谱。谢谢!

Method: 

1. Marinate the chicken for 15 minutes. Add all the ingredients to a heat-proof bowl/ container, and cover with a lid. Add water to the pot - 2 cups level. 

2. Place the bowl/ container on the rack. Close the pressure lid, and seal. Set Pressure Cook (HI)30 minutes. 


3. After natural pressure release, serve warm with steamed rice or noodles. 
若喜欢我的食谱,可以LIKE和追随我的面书专页,不要错过最新食谱发布。If you like my recipe, click hereLIKE & follow Miki's Food Archives Facebook page or follow us on Instagram: mfa_dingoozatfood  to receive more recipe updates. Don't forget to favourite my pages if you wish to see my post on your news feed. 

Tuesday, 23 August 2022

Easy Pumpkin Salad 南瓜沙拉【简单美味|营养丰富】


Try this Pumpkin Salad with an amazing combination of flavours, terrific as a side or as a light meal on its own. I never truly loved pumpkin salad until I made this! It is sweet, tasty, healthy, and easy to make. I must thank my sis who taught me how to make this :)


Ingredients: 
中文食谱:请在网页的右边点击Translate,然后选择中文翻译

300g Pumpkin


1/4 Onion, thinly sliced


1/4 tsp Salt


25g Dried Cranberries 


40g Corn Kernel (if using raw corn, steam for 5mins)


15pc Toasted Almond (I use honey butter toasted almond, gently crushed)


30g Mayonnaise


1/2 tsp Dijon Mustard


1 tsp Maple Syrup, adjust the sweetness to your preference


1/2 tsp Toasted Sesame Seeds 


Salt & pepper, add to taste


If you are sharing this recipe/ blog content, kindly attach the link to this blog instead of screen capture/ copy & paste/ use in your blog. No parts of the content of this blog may be reproduced without prior written permission. All rights reserved. Thank you. 

如果您要分享此食谱/内容,请联系这个部落格的相关链接。敬请不要复制或改篇为自己的食谱。谢谢!


Method: 

1. Slice the pumpkin, and remove the seeds. I usually buy a whole organic Japanese pumpkin, cut and use half for steaming, half of it will be kept frozen for later use.


2. Steam the pumpkin for 15 minutes or until cooked through, set aside. 

3. Combine onion and salt, set aside for 10 minutes, and then remove the excess liquid, pat dry the onion with a kitchen towel. 


4. Mash the steamed pumpkin. Combine all ingredients, and mix well. Cover and keep chill for 2 hours/ overnight before serving as a side dish, appetizer, or light meal on its own. 
若喜欢我的食谱,可以LIKE和追随我的面书专页,不要错过最新食谱发布。If you like my recipe, click hereLIKE & follow Miki's Food Archives Facebook page or follow us on Instagram: mfa_dingoozatfood  to receive more recipe updates. Don't forget to favourite my pages if you wish to see my post on your news feed. 

Saturday, 2 October 2021

Homemade Strawberry Syrup/ Sauce 自制草莓果酱


Homemade Strawberry Syrup pairs perfectly with pancakes, ice cream, milk, cakes, waffles, frozen drinks and many more! 

Homemade Strawberry Milk
~ Homemade Strawberry Syrup + Fresh Milk + Jelly Bites/ Boba Pearl ~ 
Photo Updated: 5 Oct 2021

Strawberry Sponge Cake,
added homemade strawberry syrup gives it a pleasant aroma and fruity flavour. 


You only need 3 ingredients for this recipe and it's as easy as throwing the 3 ingredients into the blender and let it do the rest of the work! You can cook this over the stove-top but it doesn't get any easier than this! 


Ingredients: 
中文食谱:请在网页的右边点击Translate,然后选择中文翻译

370g Strawberries

160g Sugar

1 tbsp Lemon Juice

Note: You may need more or less sugar depending on your personal preference and how sweet your strawberries are, so do adjust the amount accordingly.


If you are sharing this recipe/ blog content, kindly attach the link to this blog instead of screen capture/ copy & paste/ use in your blog. No parts of the content of this blog may be reproduced without prior written permission. All rights reserved. Thank you. 如果您要分享此食谱/内容,请联系这个部落格的相关链接。敬请不要复制或改篇为自己的食谱。谢谢!


Method: 

1. Add all ingredients into the blender, select <SAUCE/DIP> mode. Follow the steps in the video tutorial below. 

Watch video tutorial: How to make Strawberry Syrup 自制草莓果酱食谱视频
若喜欢我的食谱,可以LIKE和追随我的面书专页,不要错过最新食谱发布。If you like my recipe, click hereLIKE & follow Miki's Food Archives Facebook page or follow us on Instagram: mfa_dingoozatfood  to receive more recipe updates. Don't forget to favourite my pages if you wish to see my post on your news feed. 


Related Posts Plugin for WordPress, Blogger...