Click LIKE & follow us on Facebook for recipe updates

COOK WITH LOVE FOR A HAPPY HIM

Singapore home cooking/ baking/ food & recipe blog features more than 500 tried & tested, quick & easy kid friendly recipes with steps by steps tutorial.


Follow us on Instagram: mfa_dingoozatfood


If you're a company looking for possible collaboration, feel free to send me a message via Miki's Food Archives Facebook Fan Page or email to miki9mak@gmail.com


Search This Blog

Wednesday, 22 January 2020

Stir-fry Longevity Noodles 长寿面食谱


Chinese New Year is around the corner. During Chinese New Year celebration, we often eat food that have symbolic meaning for good fortune, good health, prosperity, happiness etc.... and this Longevity Noodles symbolise a long and healthy life. 


2020 is year of Rat, so I added cute little rats made of quail eggs for the kid, aren't they adorable? ;)


Ingredients: 2-3 servings
中文食谱:请在网页的右边点击Translate,然后选择中文翻译。

250g Longevity Noodles (cooked)

80g Shredded Pork/ Shabu-shabu Pork
(seasoned with 1/4 tsp Tapioca Flour, 1/2 tsp Soy Sauce, 1/4 tsp Sesame oil and a dash of pepper)

2 Prawns 
(peeled and halved, seasoned with salt, pepper and sesame oil)

1/2 tbsp chopped Garlic

1 Crab Stick (shredded)

4 Shiitake Mushrooms (sliced)

Handful of Cai Xin/ Veggies (blanched)

2 Baby Corn (sliced)


Sauce:

150g *Mushroom Water/ Stock
*The water used to soak shiitake mushrooms

1/2 tbsp Oyster Sauce

1/2 tbsp Soy Sauce

1/2 tbsp Maggie Seasoning 

Dash of White Pepper 

1 tsp Sugar

1/4 tsp Sesame Oil

1/2 tbsp Dark Soy Sauce


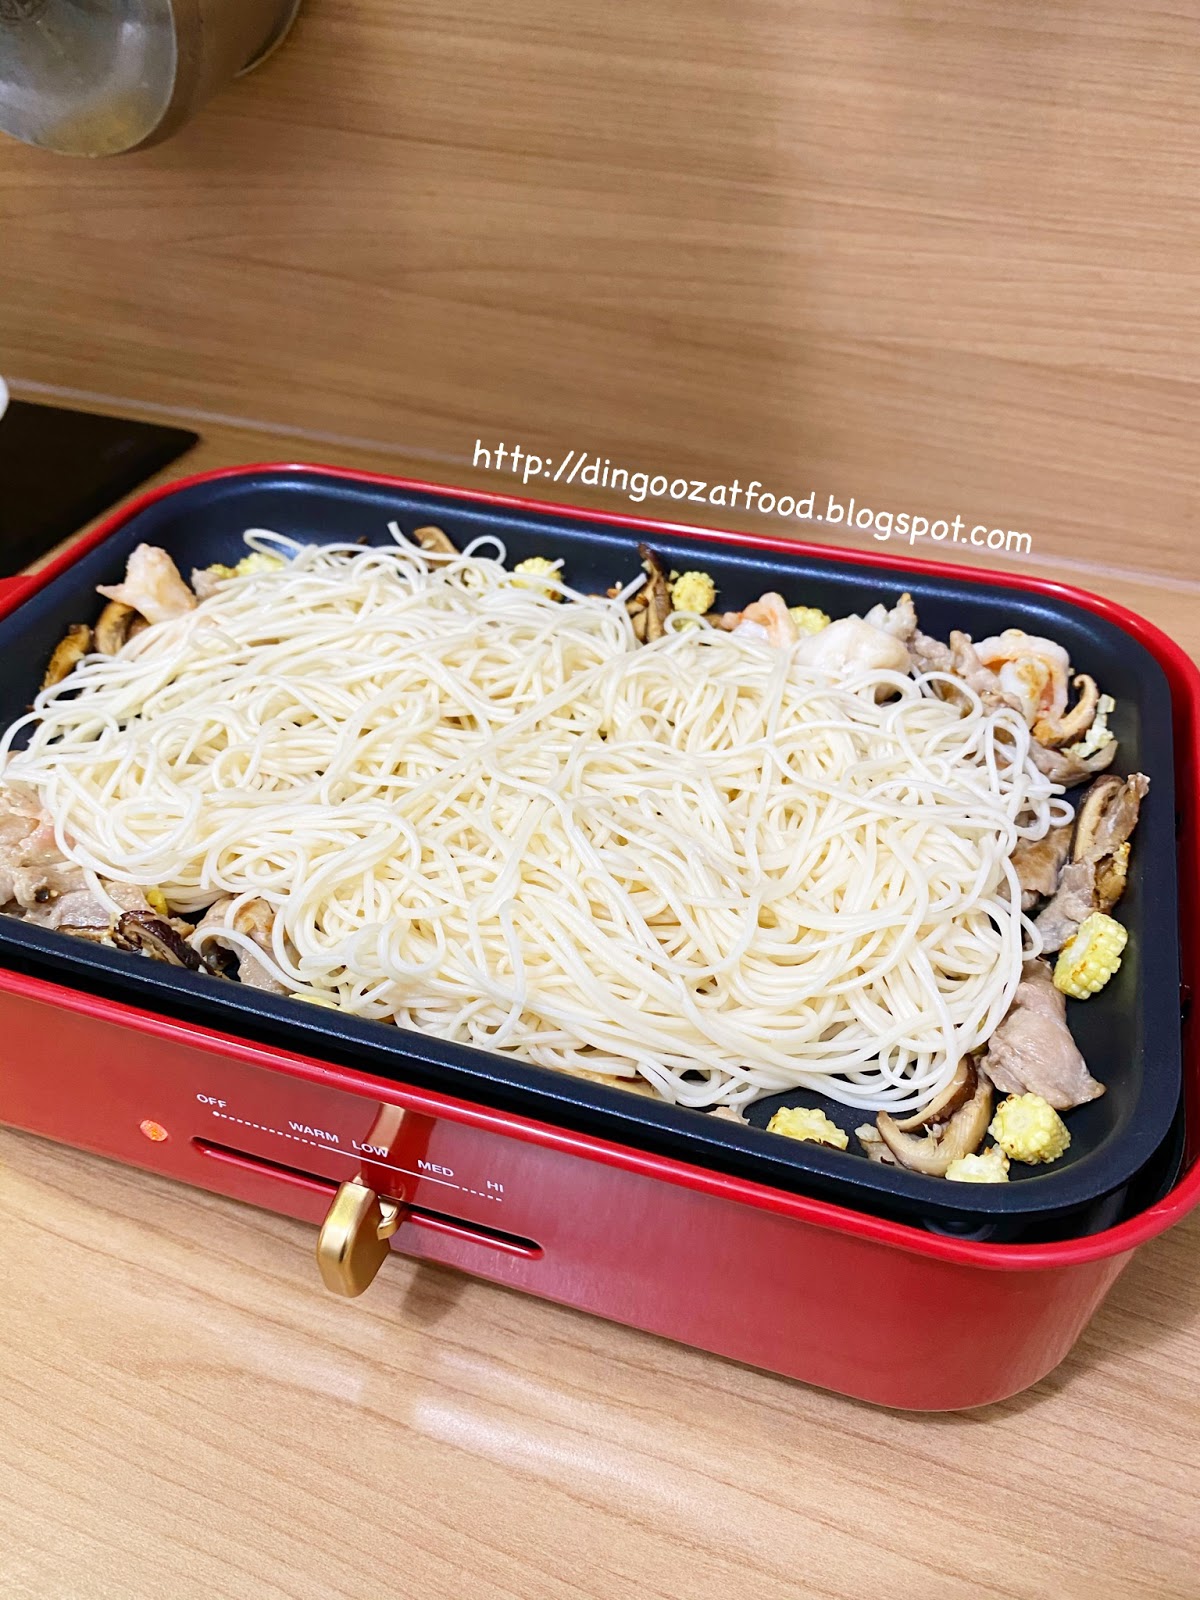
I cooked this longevity noodles using BRUNO hot plate, super easy and quick!


If you are sharing this recipe/ blog content, kindly attach the link to this blog instead of screen capture/ copy & paste/ use in your blog. No parts of the content of this blog may be reproduced without prior written permission. All rights reserved. Thank you. 如果您要分享此食谱/内容,请联系这个部落格的相关链接。敬请不要复制或改篇为自己的食谱。谢谢!


Method:

1. Heat some oil in the hotplate (low heat). Stir fry garlic until fragrant. Add in mushrooms, baby corn, pork and prawn, stir fry till cooked. 


2. Add noodles, gradually stir in sauce and mushroom water/ stock, mix well. 


3. Stir in crab stick and veggies, mix well and serve. Decorate if desired ;)

If you like my recipe, click hereLIKE & follow Miki's Food Archives Facebook page or follow us on Instagram: mfa_dingoozatfood  to receive more recipe updates. Don't forget to change the setting to 'SEE FIRST' if you wish to see my post on your Facebook news feed. 

Tuesday, 21 January 2020

Nian Gao [Pressure Cooker Recipe] 椰糖年糕【简易版高压锅食谱】


Nian Gao, translated as Chinese New Year Cake is a kind of sweet sticky rice cake prepared from glutinous rice flour, sugar and water. Traditionally it is most popular eaten during Chinese New Year. It is considered good luck to eat Nian Gao during this festive season as Chinese believed eating Nian Gao has a symbolism of raising oneself taller, higher or wealthier in each coming year. 


I love Nian Gao, especially homemade, less sweet version. I usually make traditional Nian Gao at my parent's house using slow cooker. Really SLOW as I need to steam the Nian Gao for 22 hours to get a nice brown colour. When nearing Chinese New Year, my day to day routine is scheduled with back to back baking. Therefore, I used pressure cooker to shorten the steaming time. 

I'm using Song Cho Electric Pressure Cooker SC-EP5. It's ELECTRIC, means the pressure and cooking time were preset and taken care by the pressure cooker itself. So convenient and fuss-free. 


Song Cho Electric Pressure Cooker SC-EP5.
Find out more products details from Song Cho E-Shop


Ingredients: yield 3 mini Nian Gao
材料

200g Glutinous Rice Flour 糯米粉 200克

110g Brown Sugar 黄糖 110克

50g Gula Melaka/ Palm Sugar 椰糖 50克

285g Water 水 285克

Banana Leaves 香蕉叶 


If you are sharing this recipe/ blog content, kindly attach the link to this blog instead of screen capture/ copy & paste/ use in your blog. No parts of the content of this blog may be reproduced without prior written permission. All rights reserved. Thank you. 

如果您要分享此食谱/内容,请联系这个部落格的相关链接。敬请不要复制或改篇为自己的食谱。谢谢!


Method: 步骤

1. Blanch the banana leaves in hot water, pat dry with kitchen towel and line the ramekins. 
香蕉叶烫至软。抹干后铺在容器里。


2.  Heat water and sugar till full dissolved, let it cool. Mix the syrup with glutinous rice flour, pour through a strainer. Pour the mixture into the lined ramekin, cover with aluminium foil, tied and place in Song Cho Electric Pressure Cooker inner pot. repeat for the rest.
水和糖小火煮溶,待凉。加入糯米粉,拌均后过筛。倒入容器里,盖上锡纸。放进松厨高压锅里。


3. Close the lid and ensure the pressure cooker is properly locked and balancing weight is properly placed. Press <CONGEE> function (default cooking time is 20 minutes after sufficient pressure is formed, increase pressure time to 40 minutes if preferred darker colour Nian Gao). 
把盖子锁好,配重头戴正。按《CONGEE》 功能(默认烹煮时间在气压饱和后为20分钟。喜欢深颜色的年糕,可以把时间调至40分钟)。


4. When it is done, the control panel will indicate <bb> text and it goes into keep warm stage. Press <CANCEL> button and turn off the power. This step is important to ensure the pressure is released faster. When the indicator drop, it is ready.
烹煮完成后,显示荧幕会出现《bb》字体。按《CANCEL》即取消保温程式。关掉电源,这样能使压力比较快降低。当指示阀下降后,打开锅盖,即可取出年糕。若喜欢我的食谱,可以LIKE和追随我的面书专页,不要错过最新食谱发布。
If you like my recipe, click hereLIKE & follow Miki's Food Archives Facebook page or follow us on Instagram: mfa_dingoozatfood  to receive more recipe updates. Don't forget to change the setting to 'SEE FIRST' if you wish to see my post on your Facebook news feed. 

Enjoy!


From readers, some feedback from those who have tried this recipe:

By Jeslyn See 


Thursday, 9 January 2020

FREE Limited Edition Cute CNY Theme Tang Yuan [ Collaboration With Deliveroo Singapore]


​It’s the start of a new decade, and Lunar New Year is fast squeaking up on us! Happy to team up with Deliveroo Singapore to design this adorable tang yuan to usher in the year of rat.


Traditionally eaten during Chinese festivities like birthdays, weddings, the Winter Solstice Festival and Chinese New Year, these round glutinous rice balls represent family togetherness and are thought to bring financial prosperity to those who eat them during the new year.


Here’s your chance to sweeten your reunions with family and friends with these sweet and auspicious tang yuans...


Available exclusively from Deliveroo Food Market on 31 January and 1 February with every order*, each three-piece set stars the first animal in the Zodiac, known for their intelligence, quick wit and fertility. All tang yuans are carefully designed and lovingly handmade by me, with each bowl featuring two adorably-designed mouse characters along with a mandarin orange. These tang yuans are filled with sweet red bean paste, pairing perfectly with a bowl of cool and fragrant pandan ginger syrup.


The limited-edition desserts will come along with both dine-in and delivery orders on the seventh and eighth day of the Lunar New Year, ​31 January and 1 February, ​from ​Deliveroo Food Market at ALICE@Mediapolis​, while stocks last. Mark your calendars now ;)


Friday, 27 December 2019

Japanese Steamed Cake 日式蒸蛋糕


These healthy and delicious Japanese Steamed Cakes are made with very simple ingredients, perfect for breakfast or snacks in between meals. The texture is soft and well-loved by children.


Ingredients: yield 5-6 cupcakes
材料

100g Pancake Mix 松饼粉 100克

1 Egg 鸡蛋 1粒

40g Castor Sugar 细砂糖 40克

30g Yoghurt, plain or any flavour 优格/酸奶 30克,可以用原味或其他口味

30g Milk 牛奶 30克

15g Melted Butter (salted) 含盐牛油/奶油 15克,融化

These were made using mango & passion fruit yoghurt, 
the cakes are so fragrant and well-loved by children.
用水果口味的优格,有点像冰淇淋的味道,小孩非常喜欢。


Super adorable Easter Chicks Japanese Steamed Cake made using the same recipe,
added some pumpkin powder, steamed in the eggshells.
Tap here for the steps.
Photo updated: April 2022 

If you are sharing this recipe/ blog content, kindly attach the link to this blog instead of screen capture/ copy & paste/ use in your blog. No parts of the content of this blog may be reproduced without prior written permission. All rights reserved. Thank you. 如果您要分享此食谱/内容,请联系这个部落格的相关链接。敬请不要复制或改篇为自己的食谱。谢谢!

Method: 步骤

1. Whisk egg and sugar, stir in yoghurt and milk, and mix well.
鸡蛋和糖充分拌均,加入优格和牛奶,拌均。


2. Sift in pancake mix, mix well. Stir in butter, mix well. 
过筛加入松饼粉,拌均。加入牛油,拌均。


3. Pour evenly on paper cups, and steam in a hot steamer for 12-15 minutes or till cooked through.
把面糊倒入模具/纸杯,蒸12-15分钟或至熟。即可享用。这食谱做的蛋糕口感软又绵密,不会回缩。若喜欢我的食谱,可以LIKE和追随我的面书专页,不要错过最新食谱发布。
If you like my recipe, click hereLIKE & follow Miki's Food Archives Facebook page or follow us on Instagram: mfa_dingoozatfood  to receive more recipe updates. Don't forget to favourite my pages if you wish to see my post on your news feed. 

Enjoy!

Some feedback from readers who have tried this recipe:

By Nicole Mak


Thursday, 26 December 2019

Salted Egg Yolk Prawns 金沙虾球/咸蛋黄炒虾


We love salted egg yolk everything, Salted Egg Yolk Prawns is one of it. Unlike Zi-char stall, when preparing this dish at home, I'd use prawn without shells. This way, the prawn flesh will be coated generously with a divine salted egg sauce and it's also easier for the kid to eat. 


Ingredients: 材料

6-8 Large Prawns 大虾 6-8只

1/2 Egg, beaten 蛋液 少许

Some Rice Flour 粘米粉 适量

1 tsp Minced Garlic 蒜茸 1小匙

Handful of Curry Leaves 咖喱叶 适量

1 tbsp chopped Red Chilies/ 1 Bird's Eye Chili 红辣椒碎 1汤匙/ 指天椒 1条

Some oil for cooking 油 适量


(A)

1/2 tsp Shao Xing Hua Tiao Wine 绍兴花雕酒 1/2小匙

Pinch of Salt 盐 少许

Dash of White Pepper 胡椒粉 少许


(B)

10g Butter 牛油 10克

2 Salted Egg Yolk, cooked & mashed 咸蛋黄 2粒,蒸熟压碎

1 tsp Milk Powder 奶粉 1小匙

1/4 tsp Chicken Powder 鸡粉 1/4小匙

1/4 tsp Sugar 糖 1/4小匙

Dash of White Pepper 胡椒粉 少许

Salt, add to taste 盐 适量


If you are sharing this recipe/ blog content, kindly attach the link to this blog instead of screen capture/ copy & paste/ use in your blog. No parts of the content of this blog may be reproduced without prior written permission. All rights reserved. Thank you. 如果您要分享此食谱/内容,请联系这个部落格的相关链接。敬请不要复制或改篇为自己的食谱。谢谢!

Method: 步骤

1. In a bowl, mix (A) and prawn, let it marinate for 15 minutes. 
把(A)和虾拌均,腌15分钟。


2. Add generous amount of oil in a wok, heat oil to 170'C. Coat the prawns with egg and rice flour, deep fry till golden, set aside.
锅里烧热油,把虾沾上蛋液和粘米粉,炸至金黄色,备用。

Note: I cooked this dish using Song Cho stainless steel wok, a multiply stainless steel wok without chemical coating, it's safe to use for deep frying or any cooking. For more information about the product, visit Song Cho e-shop for details.


3. Pour away excess oil, in the same wok, fry garlic, chili and curry leaves till fragrant.
锅里留下少许油,把蒜茸,辣椒和咖喱叶爆香。


4.  Stir in (B) to make the sauce.
加入(B),炒香。


5. Add in prawns, coat the prawn with sauce and serve right away.
加入虾,拌均后即可上碟。若喜欢我的食谱,可以LIKE和追随我的面书专页,不要错过最新食谱发布。
If you like my recipe, click hereLIKE & follow Miki's Food Archives Facebook page or follow us on Instagram: mfa_dingoozatfood  to receive more recipe updates. Don't forget to change the setting to 'SEE FIRST' if you wish to see my post on your Facebook news feed. 

Enjoy!

Tuesday, 10 December 2019

Custard Pancake Balls [Christmas Food Idea] 卡士达酱小松饼


Just returned home from Japan, it was a fun and exciting trip, couldn't believe we've walked more than 100km with the boy in 8 days. :D These few days, we stayed home, clear some laundry and taking a short break before our next destination...


Ingredients: yield 28pcs
中文食谱:请在网页的右边点击Translate,然后选择中文翻译

150g Pancake Mix

1 Egg

110g Milk

40g Castor Sugar

1 tbsp Coconut Oil

Some Custard  <Homemade Custard Recipe>


If you are sharing this recipe/ blog content, kindly attach the link to this blog instead of screen capture/ copy & paste/ use in your blog. No parts of the content of this blog may be reproduced without prior written permission. All rights reserved. Thank you. 如果您要分享此食谱/内容,请联系这个部落格的相关链接。敬请不要复制或改篇为自己的食谱。谢谢!

Method:

1. Whisk egg and sugar, stir in milk. Add in pancake mix, mix well. Stir in coconut oil.


2. Wipe some oil on the pan, preheat over low heat. Pour a tbsp of batter into each hole, top with some custard filling. When the surface start bubbling, turn over using 2 bamboo skewers.


3. Turn off heat when the pancake balls cooked through. Serve right away or decorate as desired. If you like my recipe, click hereLIKE & follow Miki's Food Archives Facebook page or follow us on Instagram: mfa_dingoozatfood  to receive more recipe updates. Don't forget to change the setting to 'SEE FIRST' if you wish to see my post on your Facebook news feed. 
Related Posts Plugin for WordPress, Blogger...